Log cabins are temporary houses built to provide shelters. As the name suggests, the construction materials were logs from hardwood trees.
Log cabins form an essential history of pioneers. Their knowledge and skills can also help you to build the same shelters when living off the grid.
Learning how to build a log cabin like pioneers is crucial to make the best out of off-grid living.
With wood logs and off-cuts, you can construct a shelter for your family, pets, and livestock. All needed are the axes or saws and trees where logs are harvested from.
We will highlight the basic steps to build a log cabin like the pioneers, its benefits, and its expected lifespan. Keep reading to learn how to build a log cabin like a pioneer.
Contents
- Pioneer Constructions and Log Cabins
- 10 Steps To Build A Log Cabin Like The Pioneers
- Steps 1: Prepare Tools You Must Have
- Steps 2: Prepare The Site And Clearing The Land
- Steps 3: Select The Best Logs For Your Home
- Steps 4: Set Up The Basic Design and Build Your Foundation
- Steps 5: Erect The Walls
- Steps 6: Create Door Or Window
- Steps 7: Build Your Fireplace
- Steps 8: Erect The Roof
- Steps 9: Finishing Your Flooring
- Steps 10: Seal All Of The Openings and Cracks
- Steps 11: Clean And Finishing The Cabin
- How Long Does Your Long Log Cabin Last? The Oldest Log Cabins
- FAQs
- Conclusion
Pioneer Constructions and Log Cabins

History Of Log Cabins
The first log cabin in America’s history was built by Swedish and Finnish immigrants. They came into America with the skills and knowledge of constructing these temporal structures from their home countries.
The main steps involved clearing the land, cutting the longs, and building the walls and the roof.
Pioneers would then seal the cracks or spaces between the horizontally laid logs with mud, clay, or manure. The entire log house had a wall as high as seven feet and could extend about 12-16 feet long.
Log cabins symbolize humility, hard work, and patriotism in America. About seven former US presidents were either born or had lived in a log cabin.
Abraham Lincoln is on that list. These structures rose to fame when William Henry Harrison used them as a political icon in his campaigns.
What Is A Log Cabin?

A log cabin is a type of impermanent housing structure constructed from round logs. They should never be confused with log houses because there are significant differences between them.
Log houses require sophisticated architectural skills and are constructed from hewn or hard-worked logs. Log cabins required none of these.
Instead, they were simply built with round logs laid on top of each other to form walls. No nails were used to hold the logs together.
Benefits of Log Cabins
Log cabins can be seen as an outdated housing structure but they are still worthy additions to any home. They are the best choice for garden housing with many pros, as highlighted below:
- Can be tailored to meet your lifestyle.
- Highly Energy-Efficient – Made of logs that are good insulators.
- Sustainable building structures since they are made of naturally occurring materials.
- Can Withstand the Elements – The reason for their long lifespan.
- Can be designed to any size to suit your lifestyle and garden space.
10 Steps To Build A Log Cabin Like The Pioneers

Building a log cabin is way simpler than building modern houses. You do not need as many finances as you would require to put up a two-bedroom permanent house.
All needed are the logs. No nails, concrete, or advanced architectural skills are required.
With all materials and construction equipment gathered, you can build a cabin house in a few days. Pioneers only needed to clear the land, erect the walls, hang a roof over it, and seal the cracks and crevices between the logs.
The following are the basic steps you can follow to construct a log cabin on your off-grid home:
Steps 1: Prepare Tools You Must Have
We mentioned that you only needed an ax or handsaw to build a log cabin but that might not be sufficient. A full list of tools that you should have to include the following:
Carmyra Draw Knife
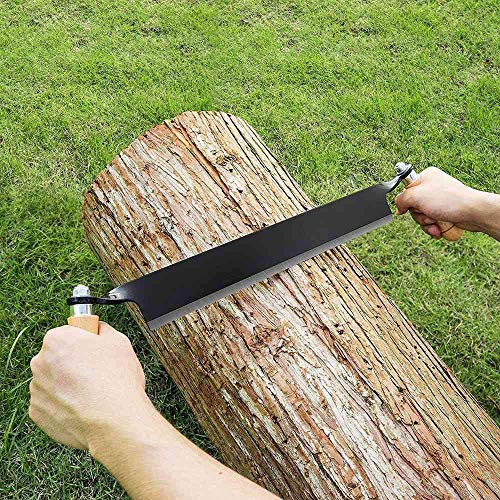
- 8" straight blade, 5 mm thick with a 30° angle for fast and accurate work
- WOOD WORKING TOOLS FOR BUILDING FURNITURE: Rapidly remove wood and bark from logs, fence posts, and firewood with the Felled | 8 Inch Straight Wood Shaving Knife Draw Shave Wood Debarking Tool; Often used by timber framers, wood turners and carvers, and furniture fabricators these log draw knife woodworking hand tools quickly remove excess materials to shape surfaces to create spindles, pegs, seats, bowls, and much more
- Designed with a long-lasting and durable steel blade with a hardness of HRC 30 for a reliable product
Steps 2: Prepare The Site And Clearing The Land
Pioneers prepared the construction site by cutting down trees, uprooting stumps, removing large rocks and debris, and raking away leaves and grass.
However, before jumping into land clearance, the challenging task was how to choose the best place to construct the log cabin.
The factors considered by the pioneers were the sun and wind direction.
The best site chosen should have maximum exposure to sunlight for natural heating by the free energy from the sun and be oriented in such a way as to avoid the draft.
As an off-gridder, you will not have access to grid power or have advanced AC systems. You need to construct an energy-efficient structure and take advantage of the freely available heat from the sun.
Steps 3: Select The Best Logs For Your Home
Pioneers had the luxury of selecting the world’s best logs from cherry trees for building their shelters.
The logs were straight, had a wide girth, and could fit perfectly well with fewer cracks or crevices between them to worry about.
Selecting the best logs can be a big challenge today because of the scarcity of log-bearing trees.
If you cannot access cherry, consider spruce, tamarack, pine, or any other tree that will give straight logs.
The length and number of logs you will need for your log cabin depend on its size and design. For example, a 16×16 foot structure that stands nine feet high would require 10 x18 foot logs for every wall.
The log cabin has four walls in this case. Another ten logs of shorter lengths are also needed for constructing the gable walls.
Note: Remove bark logs when they are fresh. It becomes harder to do it when the logs are dry.
Wilson Enterprises White Birch Log Bundle
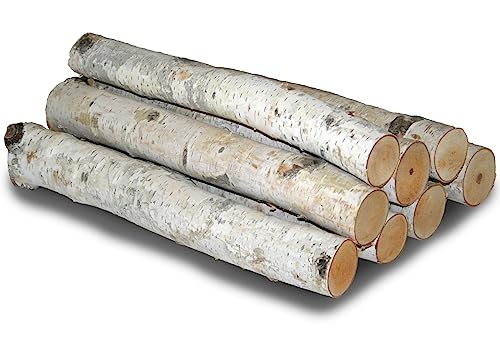
- Birch logs are ideal for DIY home decor to achieve a rustic or contemporary look as a fireplace display, filled basket, firewood rack, mantel and shelf displays, flower pots, and wedding decor
- Rustic birch logs are harvested from the wilderness of Upper Michigan and are then kiln dried to preserve the integrity of the natural bark and ensure long-term indoor use
- Includes 8 decorative natural white birch logs, measuring 15.5 to 17.5 inches long and ranging from 1.5 to 3 inches in diameter
Steps 4: Set Up The Basic Design and Build Your Foundation
You need a simple floor plan for your log cabin. Decide on the number of rooms it should have and prepare the site for it.
Pioneers placed four stones at every corner of the structure to act as the foundation. You do not need anything complicated like those of modern houses.
With nothing like squares to help find the right-angled corner of the house, pioneers needed to place four logs on the prepared and leveled ground.
Where the logs meet are the ideal positions for laying the foundation stones.
You can also add extra stones across the length of each log, especially when your log house is relatively big. That will provide the support needed to bear the weight of other logs when constructing the walls.
Steps 5: Erect The Walls
Pioneers build the walls of their log cabins with round logs joined by saddle notches. The other joint type you can consider is the dovetail notch.
However, it is not the best choice if you do not have the carpentry skills and experience needed. We will stick to the simple saddle notch joints.
Choose the straightest logs with the longest diameter to be your base. Use an ax to cut a u-shaped chunk from the underside of the log, creating a notch at either end of the log.
Lay them on the stone foundation according to the floor.
Continue notching and piling other logs on top of the already laid ones to make walls about six or seven feet high. The notches will hold the logs in place without the need for nails. Pioneers relied solely on that.
Steps 6: Create Door Or Window
Pioneers never liked the idea of having windows for their log cabins because they never had the window glasses and sturdy frames we have today. If they had to include them, they would be made from animal skins.
That compromised the safety of the log cabin. Some windows were also made from paper smeared with animal fat to make them waterproof and translucent.
Windows and doors are cut on the walls after the logs are already laid. Take an ax or a saw and cut two parallel lines from the top log all the way down to create a door.
The recommended width for the door is about three feet. So, the cuts should be three feet apart. Cut windows of appropriate size as well.
Door panels are made from boards split from logs with the widest girths.
Steps 7: Build Your Fireplace
If you desire a fireplace, then you should build it before constructing the roof. Pioneers used the stones to make a fireplace at one corner of the building.
This acted as the cooking point and provided a means of heating the house during winter.
Use stones or bricks to construct a fireplace and include a chute long enough to extend out of the roof to lead the smoke out of the house.
Steps 8: Erect The Roof
Pioneers used the purlin and rafter technique to construct a simple gable roof. To do this, extend the two shorter opposite walls upwards in a triangular shape for supporting the roof.
These are called gable walls and they are constructed using logs with decreasing lengths with the same saddle notch joint technique.
When about halfway through the gable wall, notch two logs for joining the gable walls. That provides extra support. Continue piling logs until you reach the apex. You are now ready to erect the roof.
Split the logs to be your roof purlins and rafters. You also need to cut some of the split wood into smaller pieces resembling wood shingles for finishing the roof.
You can also simply use the whole log rafters and finish up your roof by spreading grass, leaves, or branches on it.
Steps 9: Finishing Your Flooring
Log cabins use a suspended lumber floor. To construct this, you need roughly two seven-inch floor joists. Create notches on your sill for inserting these joists.
Floor joists are better placed 14 inches apart. So, the notches on the sill should follow this pattern.
For floors with sills of more than seven feet in length, you need to install struts at the mid-section to provide support.
Steps 10: Seal All Of The Openings and Cracks
Prepare clay mud by mixing soil and water or prepare a mixture of ash and water. You can also use wet animal wastes, but you are unlikely to have these if your log cabin is your very first off-grid shelter.
Insert small stones on the wall areas with cracks or crevices and seal them using the prepared clay, wood ash, or animal droppings, usually cow dungs.
Steps 11: Clean And Finishing The Cabin
Up to this stage, your cabin house is very ready. You only need to clean up the area for safety reasons. Assemble all your tools and keep them inside the structure.
Also, remove all the wasted pieces of logs and chippings that might cause unnecessary injuries. They can be used for lighting fires.
How Long Does Your Long Log Cabin Last? The Oldest Log Cabins

The life expectancy of a log cabin is between 20 to 50 years. That depends on how the structure was built and its location.
If well maintained and taken care of, log cabins can last over a century. Those constructed in areas less prone to extreme weather conditions can last even longer.
The log cabins, considered the oldest in North America, are believed to have been constructed between 1638 and 1643. It is the Nothnagle Cabin registered as a national historic site in 1976.
The structure is maintained and repaired by the Rinks, who live in the newer section constructed in the early 1900s.
FAQs
How long did it take settlers to build log cabins?
Log cabins were structures that could take a few weeks to construct for one person working alone. Usually, settlers were working as a group.
So, they needed just a few days to have everything put in place. The time it took them depended on the size of the log cabin.
What building process made the log cabin sturdier than the pioneer’s original design?
The pioneer’s log cabins were constructed using round logs joined together at the corners with saddle notches.
Modern log houses are built with hand-worked hewn logs that join together more securely than round logs used by pioneers.
What did pioneers use for chinking?
Pioneers used clay, mud, ashes, or animal wastes to seal the gaps between the logs. The inner layer was given an extra finishing of a mortar-based daubing to increase its lifespan.
Can you use pine trees to build a log cabin?
Yes. Mature pine trees are commonly used for making log cabins because they can resist decay, much like hardwoods. Yellow pine is preferred for this purpose because it is resistant to warping and decay.
Conclusion
Log cabins are easy to construct and have many uses. They can be your main off-grid house or a garden house for your livestock and pets.
You can also use them as a store for agricultural produce. Using the steps described in this article, we hope you have learned how to build a log cabin just like the pioneers.
We thank you for your time and encourage you to explore the Em Offgrid for more similar content. We have articles on various off-grid lifestyle topics that might interest you. Check them out!