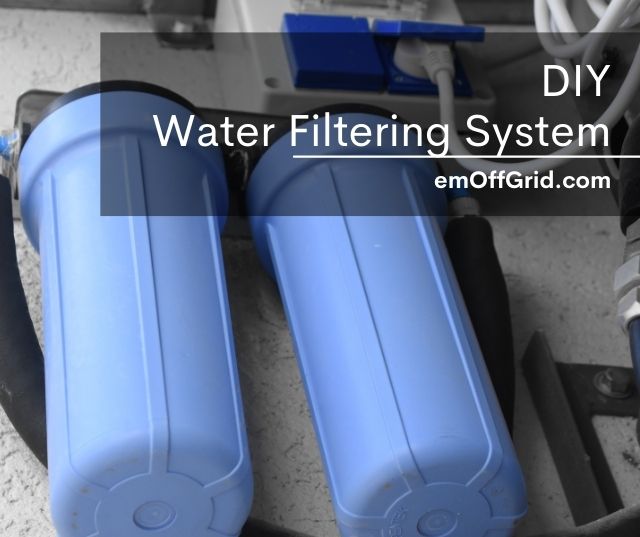
Water from wells, lakes are not safe to drink. It still includes many contaminants that you may wish to remove but purchasing a filter system may be costly.
You may find yourself in an emergency circumstance when you require a supply of drinking water to survive.
DIY water filter systems might be the answer in any of these scenarios – attempting to save a little money or desperately attempting to remain alive.
Furthermore, to know better what a DIY Water Filter System is and how we can create such a system by self-stick to this blog.
Contents
What Is A Diy Water Filter System?

Water filtration acts as a physical barrier to contaminants, therefore cleaning the water.
Certain filters filter fewer or more particles than others, depending on the function of the filtered water.
It may be used for agricultural irrigation, drinking water, public and private aquariums, and water for ponds and pools.
Many people are perplexed by the difference between water filters and water purification, as well as filtering systems and water disinfectants.
Nevertheless, this is most likely because several businesses use these words since they don’t know how to differentiate them owing to their similarities.
Benefits Of Diy Water Filter Systems
There are lots of advantages of DIY Water Filter System which are discussed in detail as below
Better For Your Health

The most significant and beneficial benefit of using a high-quality filtration system,
such as Springwell products, for your water is that it removes any hazardous and extraneous particles from the drink.
Wells, for example, which is one of the most common sources of water for off-grid living, may contain major metals such as chromium, arsenic, copper, iron, and many others.
When these metals build up in the body, they can create major health problems.
Environment Friendly
When you use filtered water, you don’t need to buy as many or any bottles, resulting in less plastic waste.
And this is critical in this sector because the bottled water business is one of the world’s top synthetic polluters.
Taste
The flavor isn’t as vital as the fact that such systems clean your water of contaminants, but for some individuals, the taste of water makes it more joyful to drink.
Gentle
This is on a larger scale than merely drinking water.
However, whether you elect to install a whole-house filtration system or simply the finest shower filter, you will be bathing in water that is free of chlorine and other pollutants.
That implies the liquid will be gentler on your hair and skin.
Some filters even reduce limescale, which is quite advantageous for those who live in hard water locations.
In Case Of An Emergency

Nobody really wants this to happen, but when major incidents strike, people may be without access to clean water, power,
And other necessities for an extended period.
For example, in February 2018, an ex-cyclone struck New Zealand. The devastation inflicted by certain cities and towns left individuals without access to necessities.
Even when the pipes were repaired as well as the water was restored, the council cautioned the people to be cautious and to boil the waters before drinking.
This is because any bacteria present in the water, such as E. coli, may be eradicated once it has been cooked.
In the instance, there was a lot of rain pouring at the time in a location with water lakes and streams and torrents.
Having such easy access to a high-quality water filter at a time like this allows a person to gather and cleanse external water.
Why Do We Need A Diy Filter Water System?
Most significantly, doing everything yourself will save you a lot of money. Whole-house water filters aren’t inexpensive.
Along the process, you’ll become a water expert and get to know your system inside and out, making installation, filter change, and troubleshooting a breeze.
You can choose any materials you want. Excellent if you choose catalytic to activate charcoal. Not an issue if you don’t think a post-filter is essential!
Apart from the filtration, all that is required are ordinary plumbing materials that can be found at a moderate cost at your local hardware shop.
You might be willing to repurpose several of the old items collecting dust in the storage.
If you like, you can make changes afterward.
DIY Your Own A Water Filtration System

There are several reasons why you would want to build your own filtration system, including the fact that it is less expensive to do so than to buy a commercial one,
And that once you build one, you can always extend it as much as you want and want.
It may even come down to knowing how to create a water filter when travelling, camping, or becoming trapped in the woods and needing to live.
We are aware that these are extreme cases, yet they do occur. So we’ll teach you how to create a do-it-yourself water filtering system.
There’s many a scheme from which to pick.
Biological Filtration
This is a residential system made up of three levels of sand, gravel, and activated charcoal.
It is a contemporary and straightforward method of filtering water from large particles at the top to small particles at the bottom, therefore purifying the water.
The following components will be required to make this system of water filtration.
- Screen
- Hole saw
- Active coal
- Five five-gallon food-grade buckets
- Sand
- Plastic piping connections
- Gravel
Begin by flipping the gallon container over. Then, at the top, you carve a hole to allow you to put in the ingredients.
The first layer is gravel, which is a rock fashioned like pebbles that will keep garbage and maybe even animals at bay.
Then comes the sand, which filters out any tiny impurities that made it through the first layer.
Lastly, activated charcoal is used in the last stage. It is useful for attempting to eliminate chemicals & pathogens that may have remained in the liquid.
This results in clean, drinking water.
Remember to make a hole that will allow you to pour the water and soil through it at the finish.
You may also ease it by placing it in a catch basin. Aside from that, you’ve just created a do-it-yourself carbon filter.
You can add more components that you think would be useful, and you may modify the design at any time. There isn’t only one way to accomplish things.
Stovetop Distillery
This is especially useful if you have a newborn and want to ensure that it has access to clean, pure water.
Just make sure it’s more than six months old.
This is a more challenging setup, but once completed, you will be able to collect water even from a wetland.
It may also be done with several common home items.
Whether you’re searching for a highest liquid distillation or need assistance navigating through the options, our reviews should come in handy.
Steps for Stovetop Distillery
1. Water may be distilled using a stove, barbecue, or campfire. Begin by partially filling a big pot with water. Place a collection bowl in the pan; it should be large enough so that the distilled water does not leak back into the main pot. Then, on top of the container, place the pot cover upside down. Turn on the heat so that it is heated but not boiling. After that, lay ice cubes on top of the newly installed cover. It will help the vapor in the pot condense to water. Turn the heat down and discard the distilled water bowl after you’re done.
2. There is a similar method, however it is done outside in a container.
3. Water can also be distilled from rain or snow. Allow a day or longer for any sediment to settle to the bottom of the bowl where the rain or snow has been gathered. It’s ok to drink it like that if you’re in a clean environment, but you may add extra filter processes if you like.
4. Another method that employs fuel or energy to heat the supply of water is Home Distillation Kits.
5. You may also distill water from plants or mud if you grasp the basic idea. This is very useful in an emergency.
Invented Coal Filtration
If this sounds similar to you, you are correct!
The DIY charcoal water filtration concept is very identical to what we did with the Bio-Filter, with the exception that you don’t need any gravel.
This distiller, however, is more appropriate if you are working outside and cannot create a full bio-filter.
- Sand
- Charcoal
- Two 2-liter plastic bottles
- A piece of fabric
The sands are placed over through the covering of charcoal in the same manner as in the bio-filter.
Because this is the central purifier, they must be in pieces when placed inside so that the water may be filtered.
The difference between this and our initial filtration system is that the water you receive will be murky and unfit to drink immediately.
You must first boil it before tasting it.
Steps for Invented Coal Filtration
1. Get Clean coal that has cooled. Start a campfire and, once you’ve built a nice coal bed, bank your fire by surrounding it with soil or ash and return in a day or three. Allow the charcoal to cool fully before removing it.
2. Crush the charcoal into little pieces, ranging from powder to the size of aquarium gravel.
3. Obtain or create a cylindrical container with open ends (taller is preferable to wider). Julie is making do with a 2-liter drink bottle with the end snipped off.
4. Fill the smaller opening with tightly packed grass or a piece of cloth to keep the charcoal from dropping out or flowing through with the water (if both ends are the same diameter, select either one). Alternatively, if you’re using a bottle with the cap still on, as we are, pierce a small hole in the cap before inserting your fabric/grass.
5. TIGHTLY pack the crushed charcoal into the container. The goal here is to produce a fine matrix for the water to DRIP through slowly, trapping additional silt and “little beasties.” If the water rushes rather than drips through the filter, your charcoal has to be packed more tightly. There should be enough chopped coal that covers the reservoir partially.
6. Place a fraction of an inch of crammed grasses or sand, or some other piece of cloth on top of the charcoal to keep it from being disturbed when you pour water.
7. Place your filter on top of a container to collect water. We’re using a glass jar to make the changes more visible, but in the woods, it’s preferable to filter straight into the pan you’ll be heating the water in instead of the one you’ll be sipping from (in the event they are not the same).
8. Fill the remainder of your cylinder with water and allow it to gently percolate through. Slowly pour the untreated water into your filter (being cautious not to dislodge your sand). Keep in mind that the water should DRIP SLOWLY out of the bottom of your filter.
9. After all of the water has passed through the filter, re-run it as many times as necessary to clear it. I normally go over it at least twice, ideally three times.
10. Once the water has reached the desired purity, bring it to a boil for a few minutes to ensure that it is fully sterilized. Remember that boiling is the only method to assure pathogen safety. (To enhance the flavor, add a tiny bit of charcoal to the boiling water.) Take advantage of your clean water!
Water Is On The Boil
This is a simple step, but it is among the most basic and important stages that most people ignore.
It varies on a variety of factors, like the amount of water and heat source, so you’ll have to experiment.
The important thing to remember here is that once the liquid begins to boil, it must be maintained for three minutes.
Steps for Water Boiling
Boiling refers to heating water to 212 degrees Fahrenheit in preparation for cooking. However, a thermometer is not required to boil water. Boiling water and any other liquids are a short process that just takes just a few actions.
1. Fill a pan or saucepan halfway with water. If we load it to the brim, the liquid will splatter out as it bubbles.
2. Place the lid on the burner and heat it too high. Your cooktop most likely has a “Hi” or “Max” option.
3. Bring the water to a fast boil until bubbling begins to breach the top. By trapping surface heat, covering the pot speeds up the process.
Water Disinfection Using The Sun
If you haven’t discovered a way that works for you yet, consider the SODIS approach, which stands for Solar Water Disinfection.
All it needs, as the name implies, is a position with plenty of sunlight and a container for the water.
One disadvantage of this method is that depending on the water source, it may take longer to filter the water.
The first simple step is to expose the water you will be utilizing to direct sunshine. A thin screen should be placed on top of it to ensure that no impurities enter.
It should take roughly two hours if the liquid is bright and clean.
If the hazy water was created by the sources, keep it for a couple of days. Every time bear in mind that by doing so, the water may not be completely pure.
If you don’t have mechanical or chemical assistance, it’s better to employ two types of filtering.
Even though the water has already been through one system, it is still best to boil it before consuming it.
Steps for Water Disinfection Using the Sun
Solvatten is portable water purification and water heater equipment developed for off-grid families in underdeveloped countries.
It is a simple, ingenious solution that provides disadvantaged people all around the world with access to clean, hot water.
The component does have a 7-to-10-year average lifespan, which implies it can withstand the critical early years when children are most vulnerable to waterborne diseases.
Hot water (up to 75°C) may also be generated via Solvates.
Waters at this degree is ideal for a variety of home and hygiene applications, including cooking, hand washing, bathing, and domestic cleaning.
Users who want colder water can simply position their gadget in the shade once the water has been cleansed. Solvatten is suitable for usage on partly cloudy days but not on wet or gloomy days.
1. Each device opens like a book and has two five-liter containers that may be filled with water through an aperture that holds a 35-micron cotton filter.
2. Sun-powered: The device is then put in direct sunshine, which simultaneously warms and exposes the water to UV rays.
3. Radiation purification: The mixture of warmth and Ultraviolet illumination is a highly effective way of cleaning water, with the water becoming pathogen-free in 2-6 hours depending on the circumstances.
4. Approved for use: When the treatment procedure is complete, an indication changes from a sad red face to a joyful green one.
What Exactly Is the Water Cycle?
Kids will enjoy making their water filter.
It is a simple task that teaches children about the water cycle through a hands-on experiment using things available around the house or outside.
Our planet, our earth, filters water naturally as it absorbs it into aquifers underneath the ground.
The earth’s natural soil, like our DIY water filters, refines animals like insects, plants, and other garbage out of the water.
This is a component of the infiltration phase in the water cycle.
Unfortunately, because of what we people do to our earth and how we pollute it.
Groundwater gets polluted and hazardous to drink before it reaches our taps as a result of pollution from lawn care products or fertilizers, as well as home pollutants.
Everything eventually ends up in our water.
Continue reading to see a selection of the best mobile filtration systems ever.
Alternatively, if you’re interested in alternative techniques, see our post on the finest UV filtering systems.
What Is the Most Effective Method for Locating the Best Filtering Solution?
Whenever it comes to water filtration systems, there are various options.
However, based on your scenario, you must know which one you require. Now we’ll show you how to test the water’s purity.
To begin, be conscious that there are several approaches to learning it. One could use a high-quality water testing kit, your intuition, or obtain a water quality assessment.
The last option looks to be the most precise, but it is also the most costly.
If you really are fascinated in perceptual evaluation, keep in mind that though this testing approach is not as exact as utilising a test kit, it can give you more basic and helpful info.
We certainly have much more than a sensation that we use to interpret our surroundings; for this test, you may smell, taste, and look at the water to determine its quality.
- Senses of smell, taste, and sight
Different odours can identify the presence of a specific substance in water.
For example, if it had a bleachy odour, it is likely that your local water treatment plant utilises chlorine to sterilize the waters.
Whenever exposed to air, this odour may fade.
DIY Water Filtering System- Final Thoughts
These methods are usually more successful than carbon-based methods at eliminating pollutants.
These filtrations outperform carbon filters and can be as efficient as RO systems at a cheaper cost, with less lost water, and without eliminating important minerals.
Filtering water may not only eliminate impurities and particles, but it may also improve the flavor of your water.
Furthermore, because it reduces the need for single-use plastic bottles, it might be a more environmentally beneficial way to consume pure water.
Thank you for choosing emoffgrid.com as your reading source!