
Can you grow turmeric indoors, and what do you need to achieve it? Yes. Turmeric plants grow well indoors if their growth conditions are met.
Turmeric plants are propagated from rhizomes with healthy buds. They require a warm temperature to sprout and grow. You also need to care for your plant for about 8-10 months before they are ready for harvesting.
Read on to find everything you need to know when growing turmeric indoors, including how to use the plant.
Contents
Turmeric and It Benefits

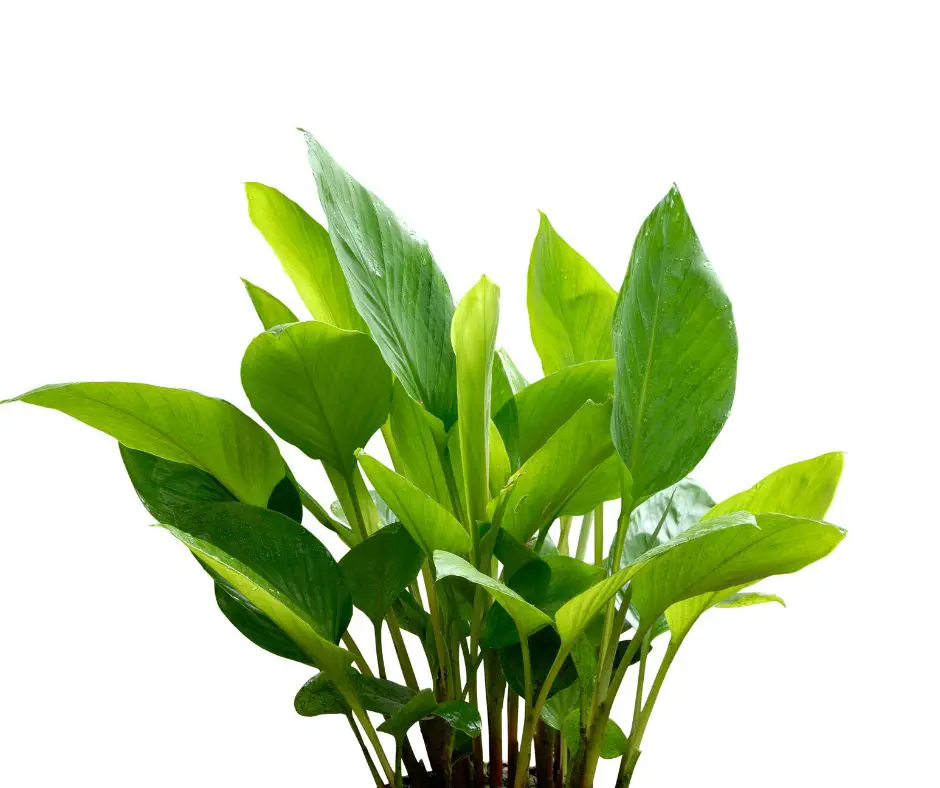
Turmeric is a herbaceous plant native to southern India and Indonesia that belongs to the ginger family. Many people grow turmeric for its range of health benefits. It has been used as herbal medicine for many years.
Turmeric has bioactive compounds such as curcumin that give it its medicinal properties. Let us quickly highlight the benefits of turmeric.
- Has anti-inflammatory properties that can help fight heart disease, cancer, metabolic syndrome, etc.
- Has antioxidant properties that make it help the body neutralize free radicals.
- Can boost brain-derived neurotrophic factor.
- Treating Alzheimer’s disease.
- Curcumin supplements are used in treating arthritis.
- Delays aging and helps fight age-related chronic health conditions.
- Manages irritable bowel syndrome.
- Helps with weight loss and manages diabetes.
- Offers protection against gallstones and manages liber conditions.
- Turmeric is also an ingredient in many recipes. Its powder adds color to foods, while leaves and shoots are part of Thai cuisines.
How to Grow Turmeric Indoors
Turmeric can be grown indoors as well as outdoors. We will, however, discuss how to do it indoors. You will need the appropriate container, potting soil, and rhizomes to properly propagate turmeric.
Once the rhizomes sprout, you have to follow a caring routine to allow them to grow without stress.
Let us look at some of the preparations you need to grow turmeric indoors.
When You Should Plant Turmeric
You can start planting your turmeric indoors as early as mid-December and as late as mid-March. These plants cannot survive the winter cold. So, they should complete their growth cycle before the harsh winter weather.
Timing is critical when growing turmeric indoors. The plant usually takes about 10 months to mature.
So, to avoid winter, plant the rhizomes in mid-December. Timing is not an issue if you live in the tropics with a longer growing season or warm conditions.
To grow turmeric indoors, you need about a 14–18-inch pot for turmeric rhizomes 6-8 inches long.
It also requires well-drained potting soil and a warm temperature, probably between 86- and 95 degrees Fahrenheit. Read on for more details!
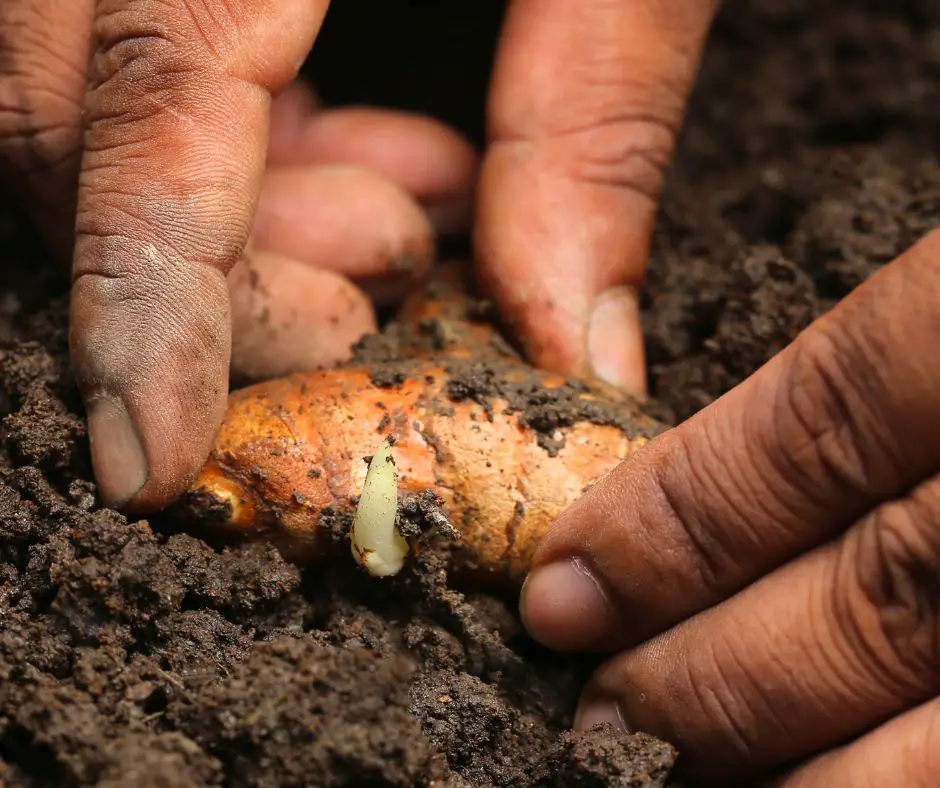
Select Plump Rhizomes Turmeric
Turmeric grows from rhizomes because they don’t produce viable seeds. So, your first step is to acquire healthy rhizomes from a grocery store or organic market. You can also order them from a mail-order nursery.
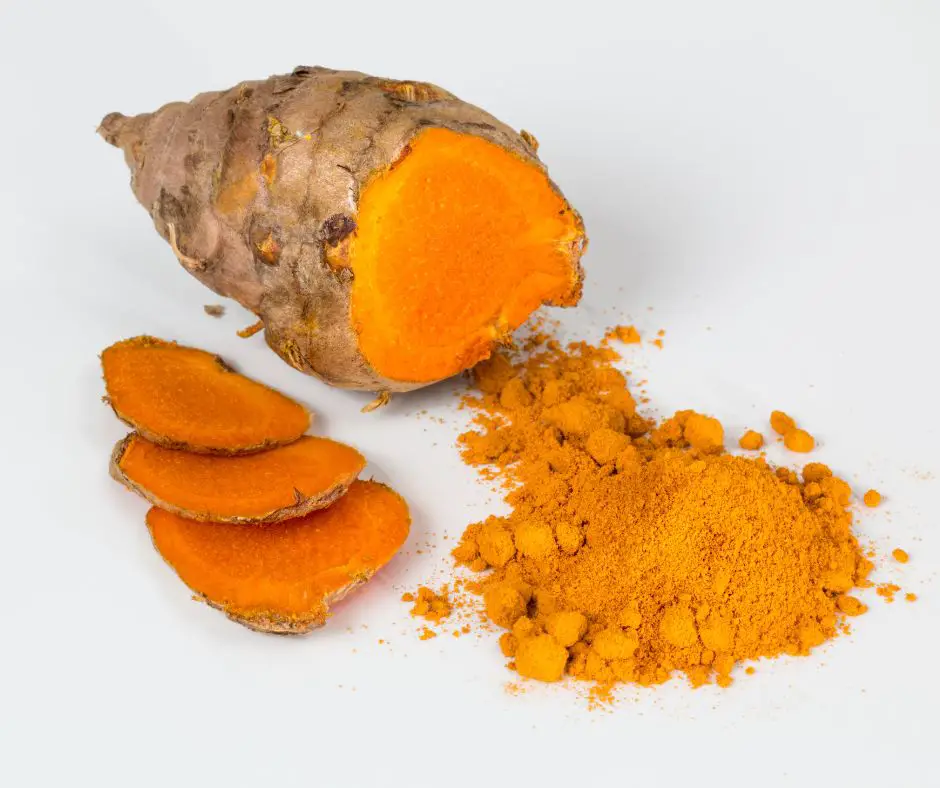
Rhizomes are the fleshy roots of the plant. Ideally, they are stems that grow laterally underground and have small hairy roots on them. Turmeric is propagated from these structures.
Choose firm rhizomes that extend at least 2 inches in length (longer rhizomes are preferred) and have healthy buds or eyes.
If you have longer rhizomes, you can cut them into small pieces containing 2-3 buds to increase the chances of sprouting.
Prepare Containers / Pot and Potting Soil
You need a large port filled with ideal soil to grow turmeric. The container should be at least in diameter to accommodate even the long rhizome piece. Also, ensure you have enough holes at the bottom of the pot to drain away excess water.
For potting soil, we recommend loamy, well-drained soil. The pH can vary from 6 to 8, but you should not compromise the drainage. You can buy a commercial potting mix or make your own at home.
If you choose to do it yourself, make it free of big clumps or rocks and make it organic-rich.
Mix about 80% organic potting soil with 20% well-balanced compost. Do not use fresh animal manure as it usually raises the temperature as it decomposes. Add small volcanic rocks that should sit at the bottom of the container to promote drainage.
Fill the pot or container almost to the top with the potting soil, ready to receive the prepared rhizomes.
Plant Grow Bags – [ Bonus Garden Gloves ]
![La Main Verte Potato Bags for Growing Potatoes - [ 4 Pack ] 10 & 7 Gallon Garden Bags to Grow Vegetables with [Bonus] Garden Gloves](https://m.media-amazon.com/images/I/51zLkU-54HL.jpg)
Planting A Turmeric Root or Rhizome
Place the rhizome horizontally on the soil in the container with the buds facing up at least 4-6 inches apart. Cover it with about 2 inches of soil and water slightly to moisten the soil.
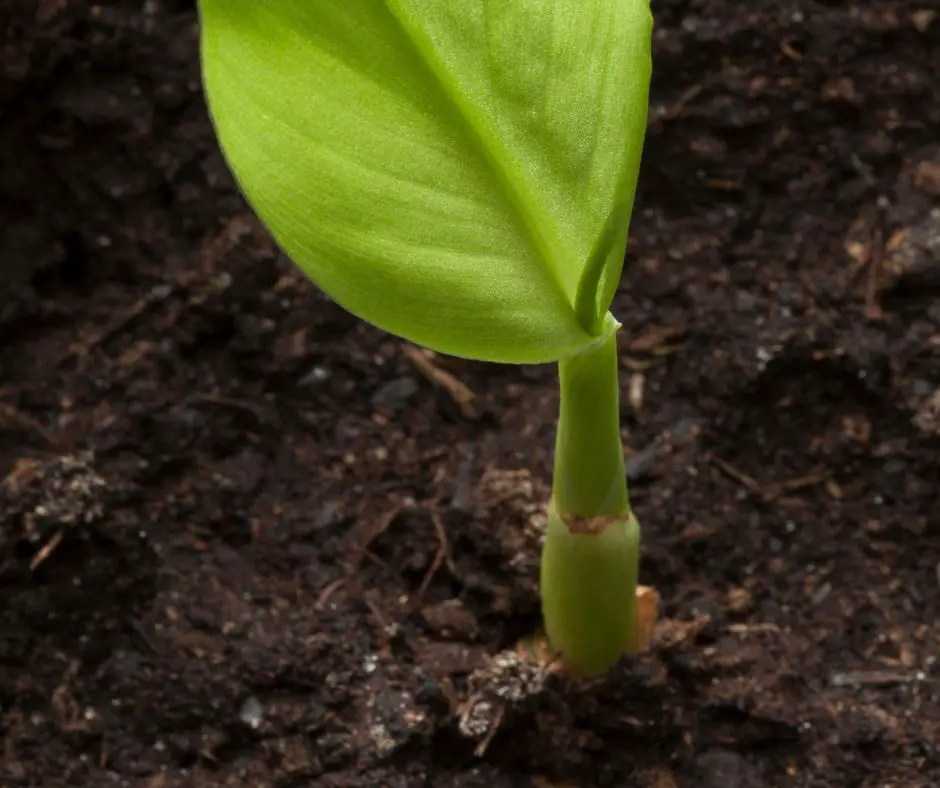
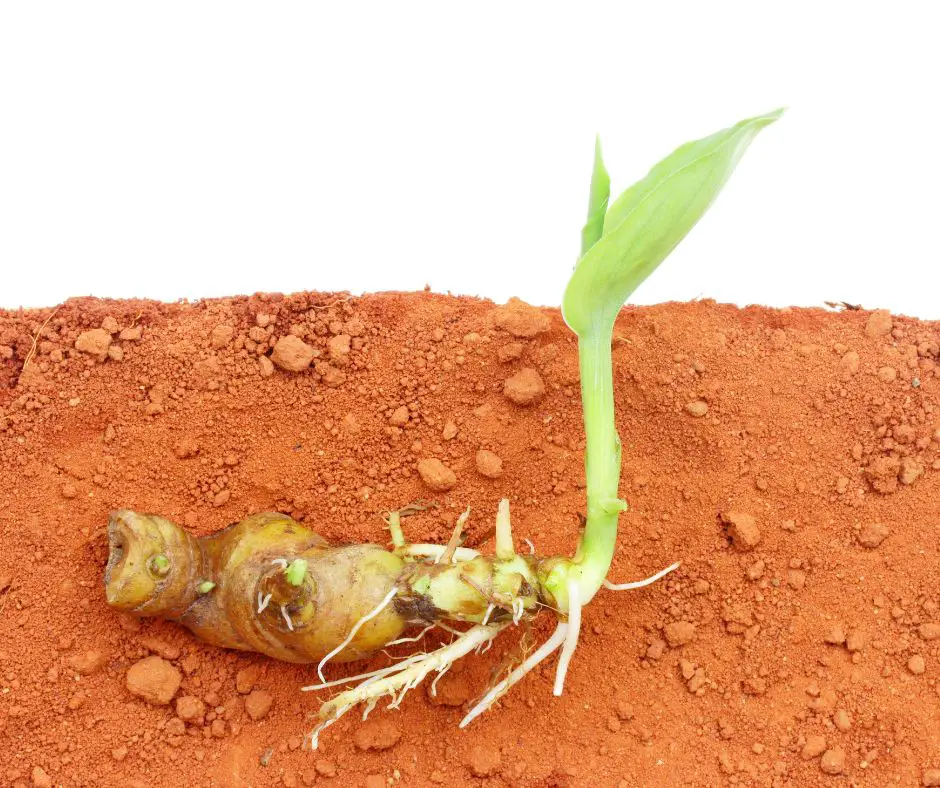
Turmeric takes about 3-8 weeks to sprout. You will need to provide the best conditions to favor this process. Otherwise, you can wait forever!
Place the pot and its content in a warm place where the temperature remains within the 86-95 degrees Fahrenheit range.
Low temperature will delay sprouting, and the rhizome may rot if the cold is extreme. On the other hand, high temperatures may kill the buds.
You can buy a germination chamber that regulates conditions or make one yourself using a heating pad, a picnic cooler, and a thermometer.
You don’t have to worry about the light before turmeric sprouts. It is not necessary at this stage. However, you can’t ignore constant watering to keep the soil moist until your turmeric sprouts. Use less water that will not soak the soil.
Lastly, you should be patient because turmeric requires time to sprout. Maintain all the appropriate conditions and just wait. Healthy rhizomes will finally emerge from the soil!
Notes for Starting Indoors
As mentioned, turmeric does not require light to sprout. That means you can put it in a sheltered place if you maintain the recommended temperature and moisten the soil.
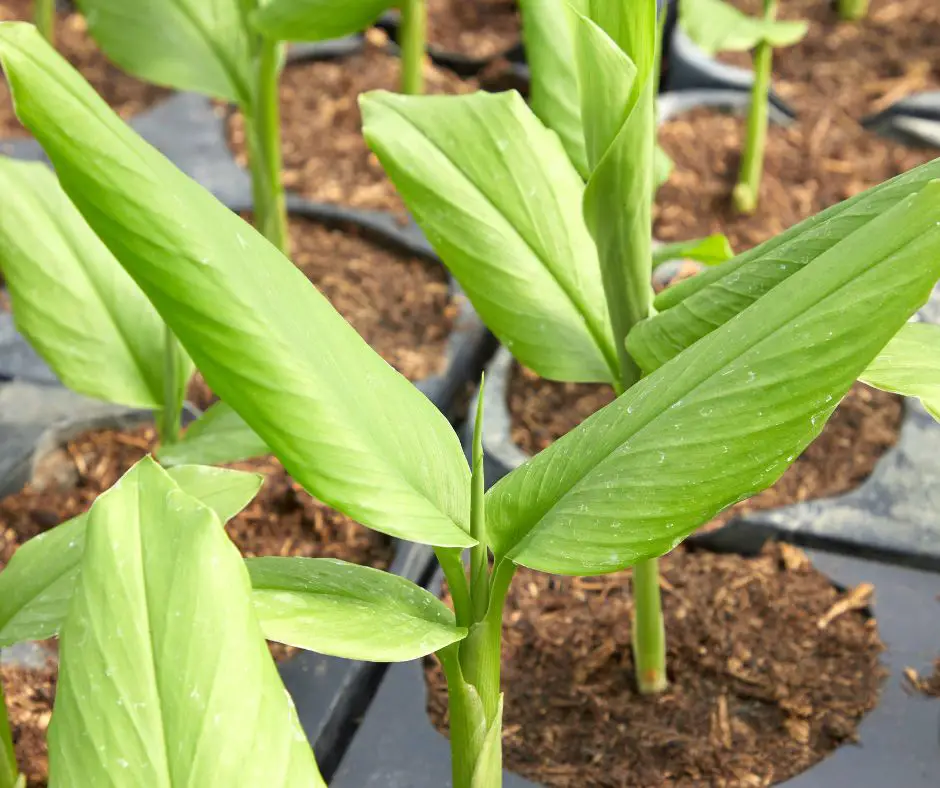
Once the turmeric rhizomes sprout, they will require sunlight. Keep them in the shade for a few more days but gradually introduce them to light.
The hardening off should take about a week before you can leave the young plants exposed for the whole day.
How to Care for Turmeric Indoors
Growing turmeric indoors can be a challenging exercise for beginners. Care does not end at the germination stage.
But if you know what to do at every step, you can keep your plant happy and get the best possible yield. Consider the following factors when growing turmeric indoors:
Sun and temperature Requirements
Turmeric requires light to grow happily. That means you will keep it indoors by the window or use artificial grow lights.
Also, turmeric requires a warm place to healthily grow. Once again, you can use heat mats or other heat sources to keep the temperature between 70- and 86 degrees Fahrenheit.
Watering Requirements
You should maintain the potting soil mildly damp but not soggy until turmeric rhizomes sprout. You can use your finger to test the soil moisture.
Do not overwater at this stage as it may cause the rhizomes to rot. Watering is only necessary when the soil surface is visibly dry.
Continue to water your turmeric after sprouting to keep the young plant healthy. Once again, you should use less water that will not make the soil soggy.
The frequency of watering your growing turmeric depends on the prevailing conditions.
They may require more water during summer when the temperature is high, causing the soil to dry fast due to evaporation. Also, the plants need more water as they grow.
Fertilize Turmeric
Turmeric is a heavy feeder. It will start by enjoying the compost in the potting soil, but that can quickly run out. To keep it happy, you should add well-balanced fertilizer throughout its growing season.
You can choose to use well-composted chicken manure if you can get and feed them at least twice. These slowly release essential nutrients that the growing turmeric needs to grow new leaves and form the bulbous underground stem.
Alternatively, you can use all-purpose liquefied fertilizer to water your turmeric. That is done every other month, and you can do it with diluted seaweed extract solution. It is preferred if you cannot make compost tea for your plants.
Pruning
Fortunately, turmeric does not require trimming or pruning. It is a relatively short plant that also doesn’t expand laterally. So, you won’t have to worry about its leaves or shoots outgrowing the available space.
5 pack Garden Pruning Shears Stainless Steel Blades

- 1. 🌿【All-in-One Garden Tool Set】 Includes 4 precision pruning shears, 1 U-shaped cutter, a pair of gloves, and a storage bag. Everything you need for flower trimming, herb harvesting, or daily plant care.
- 2. 🔪【Sharp Stainless Steel Blades】 Durable rust-resistant blades ensure clean, effortless cuts. Perfect for roses, bonsai, herbs, vegetables, or indoor potted plants.
- 3. 🤲【Ergonomic & Non-Slip Handles】 Comfort-grip handles fit all hand sizes, reducing fatigue during long garden sessions. Ideal for seniors, hobbyists, and serious gardeners.
Control Pests And Diseases
Another good news is that turmeric is not susceptible to damaging pests. However, you should look for red spider mites and scales that can affect it. Use biological methods, if possible, to control them.
The rhizome rot and leaf spot are the known diseases that affect turmeric. Root rot results from excess watering or when you grow the plant in waterlogged soil. Use water sparingly to avoid rhizome rot. Also, ensure the soil is well-drained.
Leaf spot is caused by Colletotrichum capscici and can seriously affect the plant. You can control it by spraying mancozeb at 2.5 gm/liter of water every two weeks.
How to Harvest Turmeric
Turmeric takes about 8-10 months to mature and be ready for harvesting. A mature plant grows to about 3-4 feet tall. The first signs of maturity are the leaves and stems that start to dry out and turn brown.
Turmeric is usually harvested in the fall after the first frost. You go for the rhizomes because they are the parts used in recipes and as herbs for medicinal purposes.
Harvesting turmeric is easy. Just tip the plant with the soil and shake it well to drop loose soil from the rhizomes. Cut off the stem about an inch above the swollen rhizomes and clean them well.
How to Store and Use Turmeric
You can set aside rhizomes that you want to grow again and store the rest. It is easy to preserve turmeric rhizomes for later use. You can keep them fresh or grind them into powder.
How to Properly Store Turmeric
Clean rhizomes can be kept fresh in a fridge in an airtight container for up to 2 weeks. Alternatively, you can dry them and grind them into powder before storage. This latter option gives a longer shelf life.
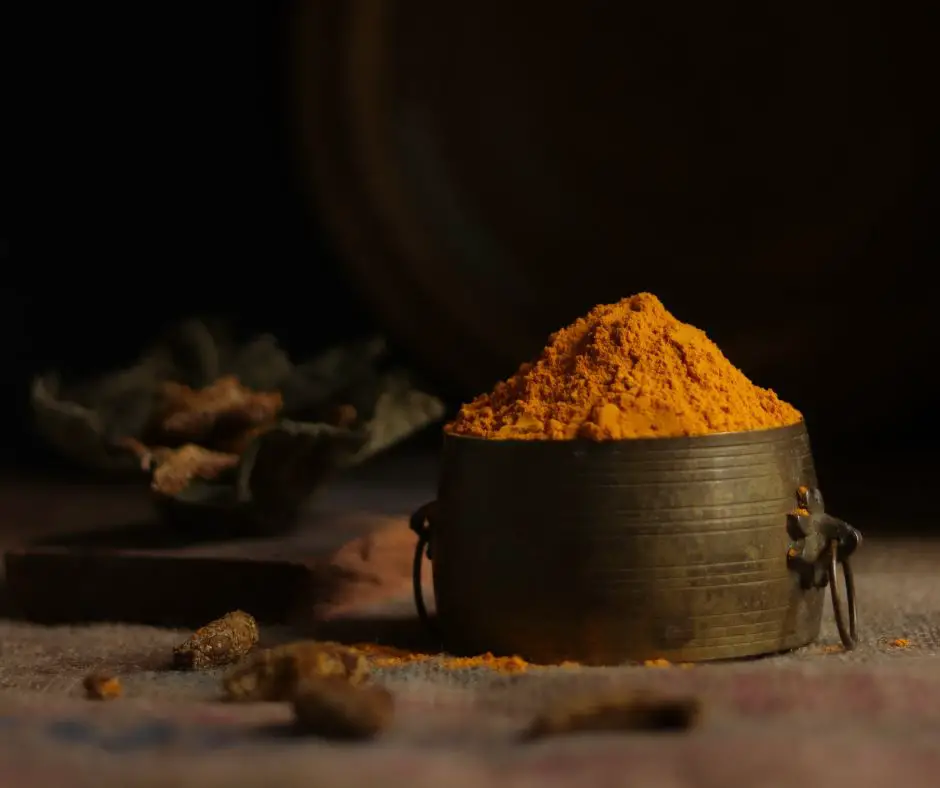
Ground turmeric rhizomes should be stored in an airtight container in a cool, dark place. You should never expose it to light or heat because it will lose its potency. Turmeric powder can last for more than six months if properly stored.
You can create a turmeric rhizome powder through the following steps:
- Clean and boil the rhizomes for about 5 minutes to soften the fibers and release flavor.
- Drain the rhizomes and pat dry using a kitchen towel.
- Cut the rhizomes into small pieces and sun-dry, or use an oven. Set it to about 150 degrees Fahrenheit.
- Grind the dried, brittle pieces in a spice mill or use a coffee grinder to form a fine powder.
- Put the powder in an airtight mason jar and keep it in a cool, dry, dark place for later use.
Note:
Wear gloves when harvesting or handling turmeric rhizomes to prevent them from turning your fingers bright orange.
Save a piece or two of the turmeric rhizomes to replant.
KitchenAid 3.5-Cup Food Chopper – Tangerine

- 3.5-Cup BPA-Free bowl and lid
- Stainless steel blade
- 2-Speed (chop/puree) one-touch operation
How to Use Turmeric
Many ways of using turmeric exist. Whether dried, fresh, frozen, or fermented, you cannot miss what to do with them.
- Grated fresh or frozen turmeric rhizomes are the best additives to beans, eggs, mixed veggies, lentils, and much more. You can use the same in fermented sauerkraut or fire cider.
- Powdered turmeric can be used to make golden milk. It involves mixing your preferred milk with turmeric powder and other ingredients.
- Turmeric can also be used in many other cooking recipes to add color.
- Lastly, turmeric has medicinal benefits. A dash of black pepper is usually added to enhance its bioavailability and absorption of curcumin.
Wrapping Up
Turmeric is an easy-to-grow plant that performs well indoors under the right conditions. It requires warm temperature, well-drained soil, and enough exposure to sunlight.
Turmeric takes about 8-10 months to be ready for harvesting. The harvested rhizomes have many uses, including being used in recipes and medicinal purposes. You can also grow your own turmeric indoors for the intended use!
Thank you for reading this article at Em Offgrid. We hope the information presented here gives you an insight into growing turmeric indoors and the benefits of this plant. Kindly share it with your friends to also know about this magical plant.