The idea of brewing your own beer just sounds fantastic. However, to achieve it, you have to follow through the processes of growing and caring for your own hops plant.
The thought of how to grow and care for hops indoors gives many homeowners butterflies, but we will make it simple in this guide.
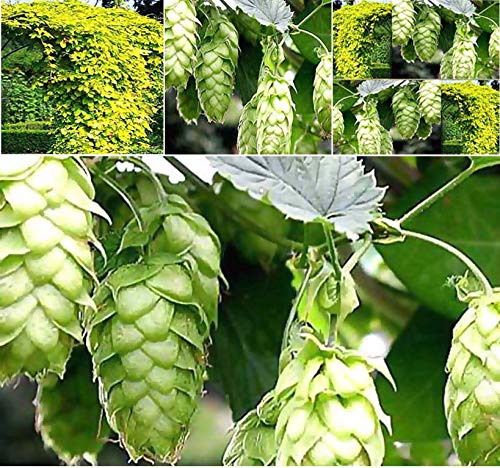
Hops are best known for their soft, green cones. It is a perennial flowering plant that has been cultivated and used in brewing for centuries.
It is still the most commonly used for the same purpose. Hops are suitable for brewing because they produce alpha acids to make beer bitter.
Another chemical in hops extracts includes lupulin, which gives beer its aromatic scent and flavor.
There is also an oil extract from the glands of this plant that allows yeast used in fermentation to thrive while choking present bacteria.
In all aspects, hops are the best for brewing, and we will enlighten you on how you can grow hops indoors.
Contents
Can You Grow Hops Indoors?

Hops are mainly grown outdoors, given the growth pattern and climatic conditions required.
Its roots grow far and wide, which might make planting them inside containers a bit challenging. They also need a minimum of six hours of sunlight.
However, you can still grow hops indoors if you are prepared to take care of the plants.
When taking these plants indoors, you need to ensure it gets the sunlight, enough room for the climbing shoot, and away from direct wind. In fact, some people take it as a hobby growing hops indoors.
Growing your own hops indoors makes it easier for you to brew your own beer, especially if you live off the grid.
Whether you want to use your backyard, balcony, patio, or living space, we will show you how to go about it.
5 Steps To Grow Hops Indoors

Growing hops indoors requires advanced preparation because the conditions will be slightly different from what you find in the field.
Many people have failed to cultivate hops indoors. And that is attributed to poor planning or lack of it.
In total, you have five steps to follow to successfully cultivate hops indoors. They are what we will discuss in this section.
Prepare Rhizomes
Hop is a dioecious plant, meaning there is a male plant and a female one. If you use seed, you have a 50% chance of producing either male or female.
Only the female plants produce the required chemicals for brewing beer.
Rhizomes are used instead of seeds to avoid having males. Rhizomes are plant parts cut from the root system of female hops.
With them, you are 100% sure that your plants will be the needed female hops.
Rhizomes are chosen wisely and better sourced from a reputable supplier. You need to be keen about this because diseased rhizomes will likely grow into diseased hop plants, and in return, lowering the yields.
Experts advise that the cultivation process should be halted as soon as you realize that your rhizome or plant is unhealthy.
Common diseases that can be carried along with the rhizomes include Apple Mosaic Virus infection and downy mildew. They will not give your plants a chance to thrive.
Big Pack – (1,000) Common Hops Seeds
- 1,000 Seeds Per Packet - BIG PACK
- HOPS - Humulus lupulus, Seeds
- This is a beautiful and under used vine. This plant gets unique foliage and the famous clusters of Hops after the blooming is over.
Choose A Suitable Location
The location will determine the performance of hop plants, whether you choose to cultivate them indoors or outdoors.
The first main factor to consider is the duration of light. Hops grow better in locations that receive between 6 to 8 hours of daylight or more.
The best location for your hop plants may be near windows, on the balcony, or patio. You also need a vertical space and an erect trellis or tie strings that the plant will climb.
Hops can grow up to 30 feet tall. You may need to consider that as well.
The last factor to consider when choosing a location in the direction of the wind. Hops don’t require direct draught. That means you should not plant them facing the wind directly.
Ready The Soil And Container
When preparing to plant your first hop plant, consider the soil drainage and acidity. People who have failed never paid attention to these two factors. So, how do you prepare soil and containers?
Look for well-drained soil. Hops may need a lot of water, but there should be no stagnation at the root zones. Excess water will cause rotting, and that is what you need to avoid at all costs.
Drill enough holes at the bottom of the container to allow water to drain out of the soil.
You don’t have to worry much about the container you should use for your plant. A 20-inch diameter planter can do the job, however, ensure it is about two feet deep.
Hops perform well in slightly acidic soil. This means that you may need/want to test the soil pH value before putting it into the containers.
Non-acidic or very acidic soil will significantly lower the performance of your hops even if you selected the best rhizomes. Those are the two areas where you need to invest the most time and money.
| Soil pH Value | Interpretation |
| 5.0 | Strongly Acid |
| 5.5 | Medium Acid |
| 6.0 | Slightly Acid |
| 6.5 | Slightly Acid |
| 7.0 | Neutral |
| 7.5 | Mildly Alkaline |
| 8.0 | Moderately Alkaline |
Establish A Place For Hop Plant To Climb
Hops are among the fastest-growing plants ever known. They can achieve several inches of height in just a single day.
That explains why you need to prepare everything before planting them, and that includes constructing a trellis for your plant.
Hop plants are climbing plants, just like the vines. Unfortunately, they can grow up to 30 feet in height. That may leave you wondering how you will manage it indoors or on your balcony.
Sigh your fear away because hops plants can be trained like any other climbing plant. You have total control over both its vertical and horizontal growth.
Trellis’s work better, but mainly indoors because you may not have that luxury of doing so in your living room or balcony.
You can construct an arch over a window or garden path and train your plants to follow.
Alternatively, you can have hooks on your ceilings to allow the hops to hang themselves once they have grown to the maximum wall height.
Trellis Netting

- De-Bird Trellis Support: Elevate your gardening efforts with De-Bird Trellis Netting for climbing plants outdoor, providing robust support while promoting vigorous growth. Its durable construction ensures steadfast assistance for your climbing plants and vegetables year-round
- Long-Lasting Durability: Constructed from UV-treated nylon, this trellis netting for climbing plants green withstands harsh seasonal conditions. It offers reliable support, ensuring your plants flourish even in the most challenging environments
- Effortless Installation: Easily customize your garden trellis by cutting the netting to fit any space, providing a perfect fit without fraying. This adaptable solution enhances any climbing plant support system, ensuring healthy and robust plant growth
Get Planting!
Timing is crucial when planting. You need to be ready with your rhizomes, containers, and soil in the early spring.
You can start planting as early as possible, provided the plants are out of the frosting danger. Do not plant if there is a possibility for frost as the hops do not withstand the cold very well.
Outdoor growers have nothing to worry about because they have all the space in the world for their plants. To them, they need to hook the rhizome in the ground and place them 3 feet apart.
However, the spacing may vary slightly depending on the variety.
Back to you, an indoor hop grower. At this stage, we believe you are ready with everything and what is left is planting.
Hook your rhizomes vertically at the middle of the planting container at least two inches into the soil and the buds facing upwards.
You just need one plant per container or planting port. You are now ready for the next face of growing hops indoors, caring for the hops.
How To Take Care Of New Hop

After successfully planting your hop plants, you need to be ready for the most challenging stage. Hops require much care and attention throughout their growing stage when grown indoors.
We dedicate this section to discussing how you can manage it without advanced experience.
Research To Full Understanding Of Hop Growth
Conducting research is not optional if you are a first-time hop grower. There is a lot of information about the plant that you should know beforehand.
First, you have to understand that they are perennial plants that will continue yielding for many years.
The harvest you get from your hop plants depends on how well you care for the plant as it grows. If everything is perfectly done, the yield can be as heavy as to bring down the trellis.
You, therefore, ensure that these structures are strong and ready for the weight of the cones.
As part of your research, you should learn everything about rhizomes. We have talked about what they are and why they are preferred over seeds, but that is not enough.
Take your time to understand rhizomes better.
In general, learn as much as you can about the hops plant. Ensure you understand everything from pre-planting to post-harvesting.
Watering And Feeding Your Hops
As mentioned, hops grow very fast. To keep up the pace, they need a lot of nutrients from the soil. For hop plants to effectively utilize those nutrients, they equally require water.
Providing just enough water and plant nutrients will guarantee a high yield.
You can still get a relatively high harvest from your hops even if you have limited knowledge about the watering and nutrition requirements.
However, all will not be well if the soil is poorly drained. We can’t stress that enough, but it’s the primary cause of failures in hops when cultivating indoors.
Hop nutrient requirements may vary slightly depending on the variety. But in general, you need the following nutrient proportions:
- 3% Nitrogen = 55 lbs per acre
- 2% Potassium = 35 lbs per acre
- 0.50% Phosphorus = 9 lbs per acre
- Boron
- Zinc
You will have to scale down the above nutrient requirements to the size of your backyard or indoor hops farm.
Also, note that it is what your hops will require in their first year of growth. It might vary slightly with those of subsequent years.
If your hops lack boron, they will display the following symptoms:
- Shoots grow at a much later date.
- Distorted leaves that are also smaller in size.
- Small spaces between nodes.
- Buds form at a much lower level. They are near the ground.
Deficiency of zinc will also show the following symptoms:
- Chlorotic leaves.
- Shoots become longer and thinner.
- Thinner and weaker brines.
As for water, you will keep monitoring your plants and add water as frequently as you can. You are better off choosing drip irrigation to only water the root zone of the plant.
Overhead irrigation or sprinklers are discouraged whether you plant hops indoors or outdoors because they make diseases more prevalent.
Common Problems And Their Control when Growing Hops Indoors
Like all other plants you grow indoors or outdoors, hops are also attacked by pests and diseases. As a resilient gardener, you should continually monitor your plants.
The earlier you detect the abnormalities, the better for treatment.
To reduce the chances of your hops being attacked by diseases, ensure you use only high-quality rhizomes. However, there is no guarantee that the plant will not be attacked by pests and/or diseases.
Aphids and mites are the prevalent hop pests. They attack the plants when they start flowering to feed on the cones and suck the juices.
These pests can destroy the plants and transmit viral infections from the affected hops to healthy ones.
Fortunately, the control of aphids and mites is easy. You don’t need any pesticides but only biological means. Use predatory mites or ladybirds to free your backyard or indoor hops from the pests.
Hops are also attacked by diseases such as Apple Mosaic Virus Infection and Downy Mildew. The latter is caused by different varieties of fungi.
Affected plants exhibit stunted growth and sully bines. The plants will lose their ability to climb up the trellis.
Luckily, there are fungicides to control mildew and other infections. You can also remove the affected plant and destroy it, but that may not be effective since the disease can spread to healthy hops.
Other hop diseases caused by fungi include the following:
- Alternaria Cone Disorder
- Armillaria Root Rot (Shoestring Root Rot)
- Blackroot Rot
- Canker
- Gray Mold
- Leaf Spots
- Phoma Wilt
- Powdery Mildew
- Rosellinia Root Rot
- Sclerotinia Wilt
- Verticillium Wilt
Viral diseases include:
- American Hop Latent
- Hop Latent
- Hop Mosaic
- Nettle Head
- Ringspot
- Split Leaf Blotch
How To Harvest And Use Your Hops

The harvesting period for hops runs from mid-August to mid-September, but that depends on the intended purpose. Ornamental hops are picked a bit earlier. So, how do you go about it?
How To Harvest Hops
First, you need to determine when your hops are ready for harvesting. To do that, pick a cone and smell it and press it in your hand.
If you can smell the fragrance and/or slightly feel a sticky substance, you can start harvesting. Some cones may also take a lighter shade to show that they are ripe.
Since you possibly have just a few hop plants indoors, you can handpick the cone. It can take you up to one hour, depending on your speed.
A healthy bine can yield 1-2.5 pounds of dried cones per plant if everything is done right.
Dry the harvested cones before storage. And you will know when they are ready once again if they are springy to the touch and let off lupulin powder.
Keep them in a cold and dry place and in a sealed bag until they are ready for use.
How To Use Hops
Apart from being used in brewing beer, hops can also be used in many other areas. These include treating the following conditions and diseases:
- Body Order
- Insomnia
- Menopausal Symptoms
- Postmenopausal Conditions
- Attention Deficit-Hyperactivity Disorder (ADHD)
- Breast Cancer
- Excitability
- High levels of cholesterol or other fats (lipids) in the blood (hyperlipidemia)
- Improving Appetite
- Indigestion (Dyspepsia)
- Intestinal Cramps
- Irritability
- Nerve Pain
- Nervousness
- Ovarian Cancer
- Overactive Bladder
- Inflammation of the bladder, etc.
However, there is not enough scientific proof on how hops may treat some of the above diseases and conditions. This means that we cannot say with certainty that hops help all these conditions. More research is still required to solidify the evidence.
Pros And Cons Of Growing Hops Indoors
Hops can perform well both indoors and outdoors, but there are challenges associated with each approach.
You can have a better yield outdoors. However, the plants are more exposed to diseases, take more space, and it’s challenging to monitor the individual plant.
When grown indoors, plants may not have the maximum sunlight required, and the space is limited.
However, the good news is that they are easier to care for and are less exposed to disease and pests. Harvesting also becomes easier.
FAQs
Can I grow hops from cuttings?
Yes. You can plant hops from brine cuttings, but you should do that as soon as you are done harvesting.
You also need to have several healthy root nodes. Using rhizomes is the most effective and recommended way of propagating hops.
What month do you plant hops?
Hops are best planted in the spring when the plants are safe from the adverse effects of frost. To ensure your plants grow successfully, fertilize and aerate the soil. Hops perform well in well-drained, slightly acidic soil.
Do hops attract bugs?
Yes. Hops bines will attract bugs, mites, spiders, and other airborne things. You may prepare for such if you plan to cultivate hops indoors. Find remedies in advance.
How long do hop plants live?
Hops are perennial plants that can live for up to 60 years, provided favorable conditions are maintained.
That figure may vary depending on the plant variety. To ensure the long life of your plants, grow them in a healthy environment.
Some Thoughts
Hops are famous among homebrewers. They mainly cultivate them in their backyard. However, you can also try the indoor approach using the information you now have.
These plants can thrive well indoors if you maintain the best growth conditions, including watering and nutrition.
You should also keep the plants free from diseases and pests for an even better yield.
We appreciate your time reading this article at the Em Offgrid. We encourage you to share and explore the website for related content.