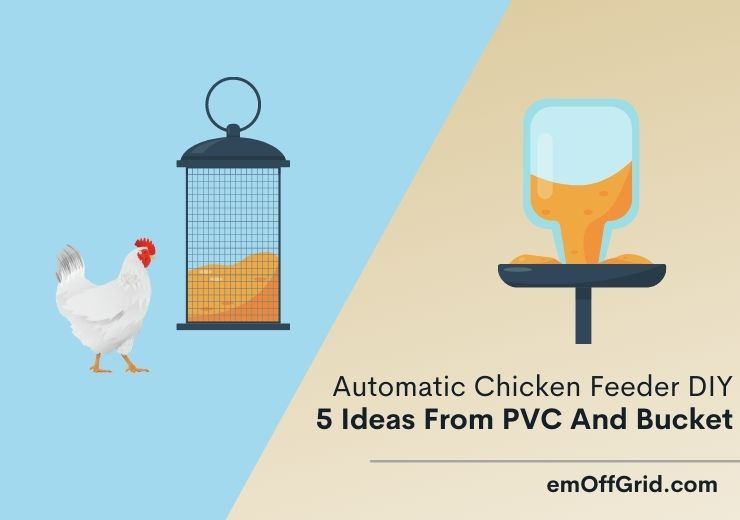
Chicken feeders are a must whether you keep backyard chickens or commercial poultry.
Having well-designed chicken feeders will reduce food waste and make your chicken comfortable when eating. You also need feeders for your poultry to avoid food contamination.
You can buy commercially made chicken feeders or you can do it yourself.
If you are living off the grid and keeping backyard chickens, we encourage mastering the art of making poultry feeders. Do that using locally available materials.
In this article, we outline the 5 automatic chicken feeder ideas from PVC and buckets. We state how to go about it step by step that is easy to follow through.
We also have additional information that you will learn in this article. Continue reading to get all these and more.
Contents
Benefits of an Automatic Chicken Feeder

Automatic chicken feeders save labor and improve work efficiency. You will see many poultry farmers adopting these feeding systems on their farms.
You can also follow suit with DIY automatic chicken feeders. Other benefits you will gain using the equipment include the following:
- Automatic chicken feeders directly fill the bucket without human intervention. That makes it safe, convenient, time-saving, and energy-saving.
- You can set the quantity of feed to give the chicken to improve the overall poultry-keeping efficiency.
- Automatic feeders limit food waste since the chickens are given what they need. Feed spillages are also minimized with well-designed automatic feeders.
- No contamination as birds feed directly from the automatic feeds and they cannot perch on them. That minimizes the prevalence of diseases.
- If you have a busy job, you have to go somewhere for 1-2 days. Your chickens are fine with the automatic feeder.
5 Ideas To Make Automatic Chicken Feeders From PVC And Buckets

Making an automatic chicken feeder is a straightforward process. There are different approaches, but we will only talk about the five main DIY ideas.
They are based on chicken feeders made from PVC and buckets. We believe you can make chicken feeders if you have these materials.
In each idea, we highlight the steps and provide a list of materials and equipment needed. Read through each of them and then choose the one to implement when making automatic chicken feeders.
PVC Chicken Feeder
You can make chicken feeders out of PVC only. You only need to get the dimensions right and a little plumbing skill to turn PVC into automatic feeders for your backyard chickens.
It can be used for feeding both chicks and adult birds, provided you adjust the height to the correct position.
Necessary Ingredients
- 5 feet of PVC pipe
- Two 90-Degree Elbows
- Cap
- T PVC Joint
- PVC Cement
Instructions To Make PVC Chicken Feeder
Cut two 3-inch PVC pieces from the 5-foot piece. You will use them for creating the two arms so that attaching the elbows becomes easy.
Apply the PVC cement in one of the side holes and quickly attach one 3-inch PVC piece.
Do the same for the remaining side. You have to carry out this step as fast as possible because PVC cement hardens almost spontaneously.
Dry-fit the elbows to the 3-inch stubs created in the previous step. Ensure the elbows are connected in a slightly upward position and about 22 degrees forward.
Use any PVC marker to create lines on the elbow pieces and where they meet the T-section. That will allow you to get the orientation right when working quickly to glue the parts with PVC cement.
Use the PVC cement and glue the pieces together as outlined in the previous step. Also, glue the remaining longer PVC pipe into the top hole of the T.
NIBCO U4810 11/2 HXHXH 45 WYE PVC White, 1.5 Inch
- Wye with three openings for connecting and branching three pipes
- Hub ends for connecting to male unthreaded pipes or fittings
- PVC-DWV for corrosion resistance, high strength, and less weight than fittings made from metal
Turn the cap upside down and cut four small slits on its sides. That will make it easier to remove it when you need to refill the feeder but optional.
Install the feeder at the correct height, depending on the age of your birds. For day-old chicks to about 5 weeks old, place it directly on the floor of the coop.
Fill the long vertical tube with the right feeds depending on the age and purpose of your birds, then, place the cap on top. Ensure the cap fits with ease because you will still need to remove it when refilling the feeders.
No-Spill Chicken Feeder
Feeding chicken can be tricky because these pecky birds can spill everything on the ground.
Whether you get the feeds for free or buy them, you still need to make sure nothing goes to waste. With this no-spill DIY chicken feeder, you can eliminate wastage when raising backyard chickens.
This automatic chicken feeder is made of 100% PVC and can be used both indoors and outdoors.
Necessary Ingredients
- 3 Feet of 3-Inch PVC Pipe
- The Y Connector
- 1 End Cap
Instructions To Make No-spill Chicken Feeder
Cut about 36 inches of the PVC pipe.
Cut the remaining piece into 6-inch and 3-inch pieces
Attach the long piece to one end of the Y connector and then the 6-inch long piece to the other end. The longest one will form the feed reserve and the shorter end becomes the base.
Attach the remaining 3-inch piece to the other end of the Y connector. This is usually the portion that sticks out at about 45 degrees. That will be the feeding spout.
Add a cap at the base of the feeder and fill the upper end with feeds.
Install the feeder in the kitchen coop. If you need to use it outdoors, buy two more end caps to close the top section and spout when it is raining.
This design is best for adult birds. If you need to make one for chicks, make the spout and the base as small as possible.
PVC Chicken Feeder With The Cap Screwed
PVC caps can be stubborn to remove, especially after it has rained. To avoid that problem, we can consider this new design with screw caps.
Whether it has rained or not, you can easily remove them by turning them in the opposite direction.
PVC chicken feeders with the caps screwed are easier to make. It is also the best option for keeping rats and other rodents at bay at night. Proceed as follows to make it for your backyard chickens.
Necessary Ingredients
- 1, 10 foot, 3-inch PVC Drain Pipe. (You will need to cut it into four equal pieces for four different chicken feeders.)
- 4, 3-Inch 90-Degree Elbows
- 4, 3-Inch 45-Degree Elbows
- 8, 3-Inch Threaded Caps
- 8, 3-Inch Cap Adapters
- Metal Pipe Strap
- Screws
- PVC Cement
- 4, 3-inch Standard Pipe Caps
Instructions To Make PVC Chicken Feeder With The Cap Screwed
Making these feeders is pretty straightforward. You only need to cut the 10-foot pipe into four equal pieces and join the elbows.
Use PVC cement to attach the 90-degree elbow to the cut PVC pieces. Again, attach the 45-degree elbow to the 90-degree elbow to make the feeding point a bit raised above the ground.
Do this for all the PVC pieces. You should have four incomplete chicken feeders.
Next, fix the cap adapters to both ends of each incomplete feeder. Install the feeders with the longer section vertical.
Fill it with the feed and then place the cap. You also need to cap the feeding points at night or when it rains.
With that setup, water can find its way into the feeds when it rains. So, you need to properly glue all the joints to make them airtight.
Also, you might consider replacing the previous caps with twist-top caps to make chicken feeders more waterproof.
Use a funnel when filling the feeders. Also, you need to cap the lower end to avoid feeds from coming out until you are done adding the feeds.
Less-Waste Chicken Feeder
With all the chicken feeders already mentioned or ones yet to be, they aim at minimizing wastage.
With this bucket chicken feeder, you can comfortably feed your chicken without worrying about spillages or excess food wastage.
Necessary Ingredients
- A 5-Gallon Bucket
- 3-Inch Piping Gasket or Caulk
- A 90-Degree Elbow
Letica 5 Gallon

- Graduation markings in gallons and liters
- 1 Pack | 5 Gallon Capacity, 11.91" Diameter x 14.5" Height
- Polished surface provides attractive appearance, Reinforcing ribs maintain container shape
Instructions To Make Less-Waste Chicken Feeder
Drill a hole at the side of the bucket as close to the bottom as possible. Push a 3-inch piping gasket through it.
Cut one side of the 90-degree elbow at an angle such that the rain cannot get into the feeds. Also, cut the other end at about one inch to remove the larger diameter pipe that usually fits the pipes.
Push the pipe through the opening at the bottom of the bucket drilled earlier. You are nearly done.
The only thing remaining is the addition of a 3-inch pipe end to the fitted elbow so that you create a lip-like structure inside it. The lip will prevent the feeds from spilling onto the floor.
You can create as many spouts or feeding points around the bucket as you deem fit or depending on the number of birds you keep.
Another advantage of this less-waste bucket chicken feeder is that it has more feed storage capacity.
So, you can consider it if you like spending a weekend away from home with no one to feed the birds. A bucketful of feed is just enough to feed the backyard chicken for the entire period.
A Bucket Chicken Feeder

This bucket chicken feeder is much more like the previous one with just a few adjustments. The materials you need for this do not change, and the capacities are somehow the same.
You do not need to buy commercial automatic chicken feeders if you just want to keep backyard chickens. With a trip to hardware, you can get all the materials you need to bake this DIY chicken feeder.
Necessary Ingredients
- A 5-Gallon Bucket w/ Food-Grade Lid
- 4, 45-Degree PVC Elbows (w/One Smooth End)
- A Sharpie
- Sharp Knife
- A Drill w/the Biggest Bit You Can Find
- Hacksaw Blade
- Rag
- Clear Silicone
- Tape Measure
Instructions To Make A Bucket Chicken Feeder
Mark the bucket where you will drill the holes for your pipes.
Make it about two inches from the bottom to minimize the number of feed left at the bottom of the bucket. Use a marker to trace the size of your PVC pipes on the bucket.
Use the drill to make one big hole at the center of the marked circle. Use a hacksaw to enlarge the drilled hole up to the circumference. Do the same for the remaining three sides.
Push your PVC elbows through the holes until the section that sticks out is perpendicular to the bucket. Once done, apply silicone on the outside joints to make them waterproof and let dry.
Fill the bucket with feed and cover it with the lid. You can fill it all the way to the top or halfway, depending on your preference.
Install the bucket feeder at an appropriate location. You can choose to raise it or leave it on the ground.
However, experiment with it to see what your birds like the most. Also, you need to sprinkle some feed around the bucket to make the chicken know what it is.
Sub-Conclusion
The DIY automatic chicken feeders described in this article use the same principles to work.
The food drops by gravity to the feeding points for the birds to easily access. As they peck, more and more feeds drop until the food reserve is depleted.
Making these buckets or PVC feeders is easy. However, if you do not have time to do so, you can consider buying any of the following commercial feeders:
- Harris Farms Galvanized Hanging Poultry Feeder
- RentACoop Twin Cup Chicken Waterer and Feeder Set
- Royal Rooster Chicken Poultry Feeder with Rain Cover
- KEBONNIXS Automatic Chicken Cup Waterer and Port Feeder Set
5 Pro Tips When Automate Chicken Feeding

The feeders mentioned are made through the DIY approach. That means you can customize them to match your needs. The following are the tips you can consider:
Don’t Be Afraid To Resize And Decorate The Feeder
As part of customization, you can resize the feeders according to the number of birds you keep. Also, the larger it is, the less need for refilling.
Lastly, you can decorate your feeders to make them unique to your farm. However, try to make them chicken-friendly. In other words, avoid overdoing it because it can scare your birds.
Always Have More Than One Tray If You Have Many Chickens
Make two or more automatic chicken feeders, depending on the number of birds on your farm. That will avoid overcrowding at the feed points and make birds feed more comfortably for better production.
Always Secure The Feeder
The feeders can topple over if they are not secured to the base frames of the coop or fence, especially the PVC types. To avoid such situations, use a wall pass or any other thing to fix the feeders on the walls.
Always Cover Feeder
Rain can damage the feeds. Covering ensures no water gets in and birds cannot contaminate them with their droppings. Also, covering the feeders will help to keep rodents at bay.
If You Notice Signs Of Rodents, Set Traps
Rodents are your great enemies in a chicken coop. You should do everything possible to keep them away, even if it includes setting traps.
They will waste your feed and make your birds uncomfortable and that should be avoided.
Conclusion
You can now choose your preferred automatic chicken feeder design to make for your birds. With the information presented in this article, you can easily make the feeders for under 100 dollars.
We thank you for your time reading this article at the Em Offgrid. We encourage you to share and check on other posts on keeping backyard chicken and other related topics.