Most of us prefer buying undressed chicken from the butchery, however, that will not be the case when you live off the grid.
This substandard yet fulfilling life will force you to have chicken processing skills if you need them as part of your meal.
Many off-gridders grow backyard chickens, ranging from 10-30 in number, as a food supplement. However, you cannot eat them without processing.
Backyard kitchen processing involves humanely killing the bird, plucking the feathers, and dissecting it.
In this post, we will only discuss how to pluck a chicken and also offer tips on doing it better and effectively. You can refer to our previous post on how to slaughter chickens without causing much pain to it.
Contents
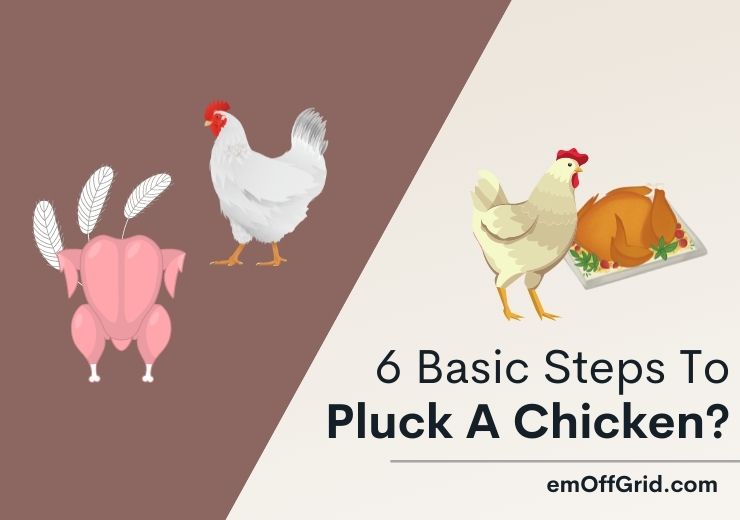
6 Basic Steps To Pluck A Chicken

Plucking a chicken is the process of removing feathers from the animal. This can be done by hand or using machines.
It is not a challenging process at all, as you might have anticipated. In just a few steps, you will have your chicken meat ready.
If you follow these steps, you should have the chicken undressed in under 30 minutes.
Step 1: You Need A Few Tools
Preparation is crucial for every project or process you want to do, and the same is true for plucking a chicken. Ensure you have the following tools ready with you:
- A 5-gallon bucket (Or Any Other Accessible Metal/Plastic)
- A Fire Pit/Electric Water Heater
- Gloves
- 5-Gallons of Water
- One-Meter Rope/Toggles/Shackles
- Water-Heating Pot (Aluminum or Steel)
Step 2: Boiling Water

Pour half of the water into a healing pot if using fire to boil the water. If you have an electric heater, then you can just heat water in the bucket. Heat water to boiling.
The whole point is to raise the temperature of the water, but boiled water is preferred because of its efficiency.
The same should be observed using an electric heater. The time it takes to bring water into boiling will depend on the heating method chosen.
Brentwood TS-322 1000w Single Electric Burner
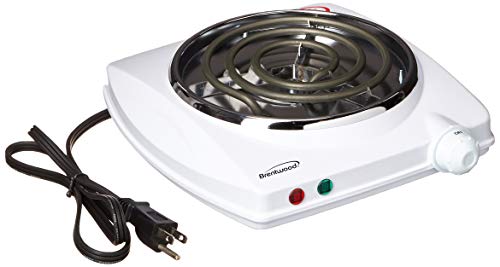
- Fast-Heat Up, Cast Iron Heating Element
- Durable, Easy to Clean Powdered Housing
- Power Light Indicator, Non-Slip Feet
Step 3: Dunk The Chicken In The Boiling Water
This step assumes that you have already slaughtered your chicken. In fact, slaughtering should be done before boiling water so that it will not cool again.
Then wear your hand gloves and proceed with the steps that follow.
Transfer water into the bucket or the open container you have. Dunk the chicken in the boiled water three times.
Each dip should take a maximum of 15 seconds and should be done in quick succession before the temperature of the water drops.
Dunking a chicken in hot water causes scalding. This makes feather plucking easier.
Step 4: Remove The Chicken From The Water And Begin Plucking Chicken
Now is the time to remove feathers from the bird and remain with meat. As mentioned, there are two ways of doing this.
You can choose to pluck the feathers with your hands or use a machine. Let us see what each approach entails:
Plucking Chicken Feathers By Hand

As the name suggests, you use your hands to remove feathers from the bird. After dunking, you are ready for this step.
Take the chicken out of the water and hang it upside down. This makes it possible to use both hands to pluck feathers, thereby shortening the time.
A well-scalded bird should not be difficult to defeather at all. By just applying a slight thumb pressure, you can remove all the feathers.
Please note that over scalding caused by excessive dunking will partially cook the skin of the bird. Both under scalding and over scalding will make defeathering difficult.
A perfect scald will make both feathers and pin feathers easy to pluck off. It is better to start plucking feathers from the tail down the back, breast, and finally the head.
Simply pull off feathers from the bird along the grain to avoid possible tearing of the skin. Pick a handful of the plucked feathers and use them to rub off the pinfeathers.
Pros and cons of Plucking Feathers by Hand
Using your own hands to pluck feathers from the slaughtered bird is more fulfilling than using machines. You will get that personal satisfaction that you have managed to defeather a chicken.
Hands also give you a cleaner chicken since you can manually pull out every feather and pinfeather.
However, the process takes much longer when done by hand than by machines. It might take 5-20 minutes, depending on the speed of your hand and the size of the chicken.
Also, how dunking was done can dictate the feather plucking time.
Using Chicken Feather Removal Machine
A defeathering machine is used to remove feathers from different poultry birds to harvest the meat.
These machines are very reliable, efficient, and time-saving, the reason why they are commonly used for large-scale defeathering.
Yardbird 21833 Chicken Plucker
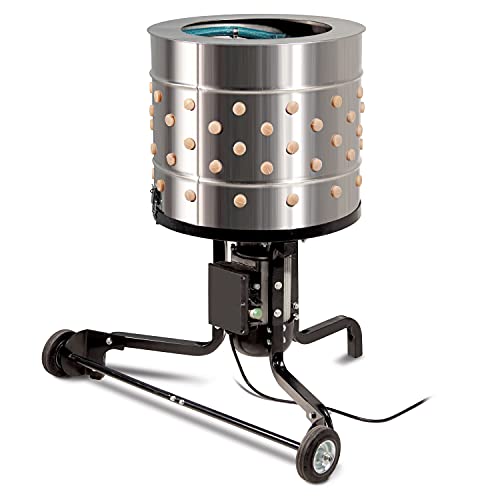
- POWERFUL AND EFFICIENT PROCESSING: With a heavy duty 1.5 HP motor and 300 RPMs of spinning force, Yardbird can de-feather chickens, ducks, geese, hens, waterfowl and other birds in just 15-30 seconds following an appropriate scalding process. A roomy 20” diameter drum easily accommodates many sizes of birds.
- NATURAL AND SAFE DEFEATHERING: 110 individual rubber fingers naturally and gently remove feathers dirt and grime from the skin of the bird. A drum-sensing safety switch and GFCI ensure that the operator is safe and secure during processing.
- SIMPLE DEBRIS COLLECTION: An integrated irrigation ring with standard garden hose connector allows for hands-free flushing of plucked feathers into the feather chute. Feather collection is accomplished by simply placing a 5-gallon pail under the chute.
A Tub plucker is one of the defeathering machines you will find out there. These devices have a barrel lined with rubber fingers and a spinning base.
When in operation, electric motors spin the bottom of the barrel, which pushes the chicken against rubber fingers to pluck off feathers. The entire process can be completed in less than a minute.
Pros and Cons of Defeathering Machines
These devices are very efficient, fast, and reliable. Some of them can defeather a full-grown chicken in under one minute, making them ideal for large-scale operations.
However, defeathering machines are expensive if chosen for plucking feathers from backyard chickens. The high upfront cost and maintenance cost might be beyond reach for many off-gridders.
We, therefore, do not recommend it for personal use not unless you run a hotel or chicken butchery.
Step 5: Remove Pin Feathers
Pin feathers should have been removed from the previous step. But if you never did, then this is the last chance you have to ensure that your meat is free from all feathers.
Pick a handful of feathers and use them to rub off pin feathers from the bird. Defeathering machines should do this automatically. So, you have nothing to worry about.
Step 6: Rinse chicken with water

As the last step before you forward the slaughtered chicken for dissecting and parts separation, you need to clean it. Rinse the undressed bird with clean water, removing the feathers that might be stuck on the skin.
Tips For Pluck A Chicken
- Put on thick rubber gloves.
- Carry out the feather plucking process as expeditiously as possible.
- In particular, many information sites always tell you to pluck the hairs against their direction, with a strong pull that will not tear the skin. This is not always true. Plucking feathers in the opposite direction of the feather is likely to tear the skin, and that is not what you want. So, pull the feathers along their directions, and always pressing close to the chicken skin. The pull is parallel to the skin surface or along the grains but not perpendicular.
- You might also read some blog posts telling you to “add a teaspoon of dish soap to the water”. This is true because it makes plucking your chickens easier. However, in my opinion, you should not do this. No matter how much you try to rinse it, the scent from that mixture will always prevail and might affect the taste of the chicken.
Wrapping Up

In just six steps described in this article, you can have your backyard chicken ready for cooking.
Plucking feathers from a chicken should be a straightforward process for you now that you have this information. Just ensure that you have all the tools and materials needed for defeathering.
We thank you for reading this article at the Em Offgrid. We hope you have learned something and might be interested in our other post on the off-grid survival tips. You can check them out!