If you have trees in your homestead or you live off the grid, you should be pruning them at some point. These are often seen as waste wood.
While some people use them as firewood, they make the best DIY branch fences ever seen. Instead of burning pruned tree branches, as others do, you can make fences.
Fences serve many purposes at home. Apart from demarcating boundaries, they add privacy and restrain your pets.
Many people are also using them to protect their gardens. In all aspects, we cannot ignore just how beneficial fences are.
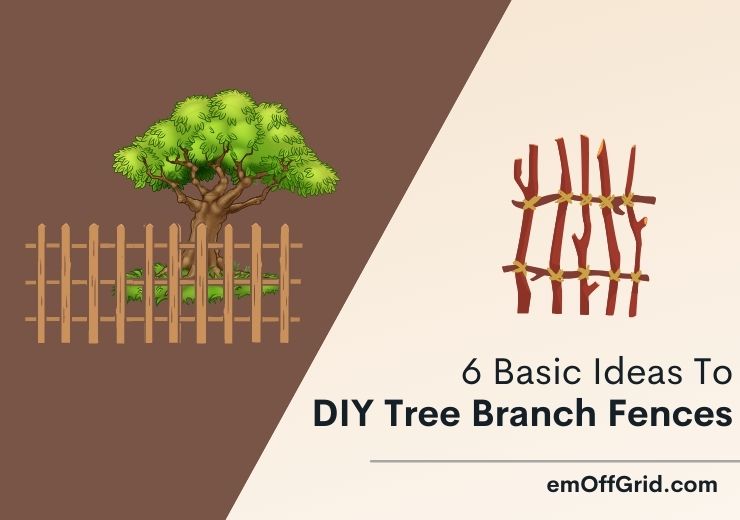
In this article, we will talk about the 6 basic ideas for DIY tree branch fences. These are DIY projects that you can do. No expertise is needed! Read on to find all the details.
Contents
Why Should You Have a Fence?
A fence is fundamental to every home or garden. The first benefit of fencing is that it demarcates boundaries. You can tell the size of your property by just fencing it. It will keep you at peace with the neighbors.
The second benefit of fencing your property is enhanced privacy. If you want to keep your home away from the prying eyes, then erecting a fence around it is the only way.
No one will see what you have on your lawn or the things you do on your homestead.
Fences enhance security, even if it is made of branches. It helps you keep intruders at bay.
Even wild animals and stray pets that could walk freely to your home will move away if they come across a fence barrier. You feel safer with a fence around your home.
The last benefit of fences we will talk about here is garden partitioning. A fence around your garden can just be the only missing feature to make your plants thrive.
Some varieties grow better under the micro-climate it creates. They also need protection from poultry and pets, and a fence barrier is all you need.
Also, you can use fences to add curb appeal to your home. However, it will depend on how it is constructed. Some may become eyesores while others enhance the home aesthetics.
6 Basic Ideas to DIY Tree Branch Fences

Erecting a fence around your property doesn’t have to be an expensive project. You can accomplish the same with a DIY fence constructed with tree branches.
There are many fencing ideas, however, we will talk about the six most common ones, which include the following:
- Wattle Fencing
- Twig Lattice Fence
- Stacked Fence
- Bamboo Fences
- Jackleg Fence
- Rustic Pasture Fence
The above-listed tree branch fence projects can be done with locally available materials and without expertise. All it takes is commitment. Let us get details on how to go about them below.
Wattle Fencing

By description, a wattle fence is made by weaving thin and flexible tree branches or slats between vertically erected posts to add strength.
The result is a rustic-looking woven lattice structure that is both aesthetically appealing and functional.
A wattle fence is for enclosing ground or when you need to control livestock movement in your property. But how is it constructed?
Preparing to Build Wattle Fencing
A wattle fence is constructed using two main parts: the vertical posts and the branches for weaving.
The preferred trees for harvesting weavers include willow, chestnut, elm, hazel, reed, alder, or any source. What you use depends on what you can source locally.
You need the following tools to construct a wattle fence:
- Rebar Caps
- Machete/Cutting Tool
- Gloves
- Mallet
- Measuring Tape/Garden Hose
Hooyman Bush Machete

- DIMENSIONS: 20.25 inches L x 2.75 inches W x 1.25 inches D and weighs 1.6 lbs
- DURABLE: Blade is constructed of 3CR13 stainless steel with a refined edge for a dependable cut in all situations
- RELIABLE: Features the new, no-slip, H-Grip on the ergonomic handle that turns tacky when wet to ensure a secure grip in all conditions
Instructions to Build Wattle Fencing
As mentioned, wattle fences are constructed by weaving the flexible tree branches around evenly spaced vertical posts.
With the appropriate materials and tools, that process is easy to accomplish. Follow these steps to make a wattle fence.
Start by collecting all the materials you need.
These include the tools listed earlier, about 4-inch in diameter poles/rebar sections, and at least one-and-a-half-inch diameter and at least 4-foot long weavers from a plant of your choice.
The quantity needed depends on the length of your fence.
Wear your gloves and get to work. Start by marking the fence line using a measuring tape or garden hose.
Use a machete to sharpen one end of the poles. Once done, use a mallet to hammer them about half a foot deep into the ground and about two feet apart.
Start weaving with thicker and heavier branches. Do it in an alternating in and out pattern around the poles, compressing them down as much as possible.
Use the thinner, lighter ones to weave the top section or to fill in any left gaps. Tie the ones at the top with a copper wire to stop them from coming off, and place the caps on the poles to finish off.
Wattle fences are easy to construct and do not require many materials. However, they are not as strong and durable as modern-day fences. However, you will enjoy the aesthetics, security, and privacy.
Twig Lattice Fence

Twig lattice fences are the diamond-patterned type where the tree branches are laid diagonally on the profile.
The sticks or branches are tied to each other with a string or wire where they cross to give them the needed strength.
Preparing to Build Twig Lattice Fence
To build a lattice fence, you need fresh, straight hardwood cuttings of about ½ inches in diameter and about 4 feet long.
Again, you can harvest them from apple shoots, willow, maple, sassafras, or any other tree species that produces sturdy straight woods.
The tools you need for the project include the following:
- Gardening Gloves
- Pointed Shovel
- Anvil Pruner
Fiskars Power-Lever Anvil Pruner

- GARDENING ESSENTIAL: The Fiskars Power-Lever Hand Pruner with anvil blade design is ideal for pruning dry, dead growth when dead-heading flowers, stripping small logs, or cutting back branches and stems that died over the winter
- MAXIMUM POWER AND PRECISION: Fiskars pruner with Power-Lever technology increases leverage for more branch-cutting power than traditional designs, making it a perfect branch trimmer or flower stem cutter
- LONG-LASTING AND RELIABLE: Gardening shears with razor-sharp, precision-ground steel blade cuts with less resistance than thicker blades and stay sharp; low-friction blade coating for smoother cuts with less gumming and improved rust resistance
Instructions to Build Twig Lattice Fence
Sort your sticks by length. The longest ones are used first and the shortest last. Drive the support poles into the ground to about 6 inches deep.
That should be done at the end of the fence and at the middle. Fasten twine on both ends just above the ground. It will be your guide for setting up the diagonals.
Before proceeding, you need two measuring sticks. These are the 5-inch-long stick for measuring the space and a 3-feet long one for checking the height of the fence.
Place the 5-inch measuring stick at the center of the support stick. Insert a fencing stick into the ground at the other end at an angle of 60 degrees.
Repeat the same process for all the diagonals along the fence while keeping them parallel to each other.
Do the opposite of the process. Insert another set of parallel sticks to cross the previous ones forming the lattice or diamond pattern. The fence is almost done, but we need to give it more strength.
Tie the crossing sticks at the top, middle, and bottom. Finish the fence construction by trimming the ends.
Twig lattice fences are aesthetically appealing because of the all-wood construction.
They are preferred for garden fencing and protecting and offering support for plants such as peas, peonies, tomatoes, and many others.
However, lattice fences are not as strong as wattle fences. They cannot be used to restrict the movements of livestock.
For that, you might need a more robust construction using hardwoods of larger diameters than what we have described here.
Stacked Fence
Stacked fences are praised for their unrivaled curb appeal and wildlife-friendliness. It can be the best way to invite birds to your property as they like nesting on a stack fence.
Preparing to Build Stacked Fence
Constructing a stack fence involves preparing the logs. It is the most challenging part of the process. To do so, you need the following tools:
- Safety Glasses
- Hearing Protection
- Sledgehammer
- 2-3 Splitting Wedges
- Maul
- Logs( Cut to Length)
- Chainsaw (Optional)
Any hardwood tree can produce logs for your stack fence, however, oak is a good choice. Alternatively, you can construct it from round logs of sizable diameter.
You do not need the tools mentioned above if there is no splitting involved.
For splitting logs, they need to be about one foot in diameter and six feet in length. Use the wedges and sledgehammer to perform the task. If you opt for tree branches, they need to be at least three inches thick.
Instructions to Build Stacked Fence
The stack fence construction begins by sorting out the logs. Sort them by size, grouping the ones that appear to be the same together. Thicker logs will be used for laying down the foundation of the fence.
Up to this point, you have achieved the most challenging part of the process. Mark out the fence line and the first layer. It is advisable to put this first layer over stone supports, however, you do not have to.
The logs are stacked in a zig-zag pattern forming an angle of about 130 degrees. Once done with the foundation rail, start putting a second one on top and continually build on it to the desired height.
Constructing a stack fence is easier if it encloses an area. If it has two open ends, you will need vertical posts to support the logs.
Alternatively, you can reduce the number of logs in the stack by one as you approach the end and let the final two lay on the ground.
A stack fence can last long, and the layers can be built gradually. You don’t have to take it from the first to last in a day. However, the fence takes many materials and can be hazardous if the height goes past two feet.
Bamboo Fences

Bamboo fences are naturally beautiful if they are perfectly constructed. They are phenomenal pieces of art that add class to any property where they are used.
Bamboo is also the most appropriate material because they grow faster than any other known tree.
Preparing To Build Bamboo Fence
As a sample bamboo fence project, gather the following materials:
- 4×4 Inch, 6-Foot Long Wooden Rails
- 2×4 Inch, 8-Foot Long Wooden Rails
- 4-Foot High Bamboo Rolls
- 8-Foot Long Bamboo Rolls
The quantity of the above materials you need depends on the length of your fence. The longer it is, the more you need.
Instructions to Build Bamboo Fence
Start by marking the fence line and digging the holes that will take a third of the post. The holes should be eight feet apart for fixing the posts.
Insert the posts into the holes and refill them with gravel up to about two inches.
Nail the 8-foot long wooden rails on the sides and fill the remaining part of the hole with concrete mix.
With the wooden structure in place, fix the bamboo rolls along the fence by screwing them against the cross members.
Alternatively, you can tie them with a rope or string. Now screw the 8-foot long bamboo rolls across the profile to add more support to the fence.
Nothing beats a bamboo fence in aesthetics. It is also easy to construct since the bamboo rolls are straight. If you live in an area with bamboo, then this fence should be your number one choice.
Jackleg Fence
A Buck Fence, also known as a Jack Fence or Jackleg Fence, is the best way of adding a traditional accent to your home or cabin.
As opposed to other DIY fencing ideas, the Jackleg Fence does not need any hole digging.
Preparing To Build Jackleg Fence
A Jackleg Fence consists of rails supported by two vertical posts joined together at an angle, forming an X-shaped leg. For you to construct one, you need the tree branches.
You can choose pine, poplar, or any other hardwood tree that will yield straight branches about 4 feet long and 8 inches in diameter.
You might need an ax or a chainsaw and protective gear to harvest the tree branches.
Instructions to Build Jackleg Fence
Constructing a DIY jackleg fence is a straightforward process.
Simple materials and tools are required to construct this fence. Like all other DIY fences described here, it also adds aesthetic appeal to your home. Jackleg Fences may not be the strongest, but it is better than none.
Rustic Pasture Fence
If you want to partition the pasture for your livestock, this is the best fence type. It is strong enough to prevent the animals from wandering away.
Preparing To Build Rustic Pasture Fence
The materials you need for this particular fence will depend on the type of pasture fence you want to construct or the livestock that will use it.
In general, you need logs or tree branches, an auger bit for drilling holes for the posts, and a distance measuring instrument.
Instructions To Build Rustic Pasture Fence
The difficulty of constructing varies. It may be challenging to handle. Get detailed information and construction procedure before proceeding with the task.
Constructing pasture fences is challenging. Many factors have to be considered. However, it is worth it because of the crucial role on your property. Take your time when constructing one.
FAQs
What is the cheapest way to build a fence?
The cheapest way to build a face is using locally available materials such as tree branches and twigs. You do not have to visit a hardware store and spend on fence panels or chain links.
Just prune the trees on your property or look for the fencing material from the jungle and use the DIY ideas to construct a fence.
What is the easiest fence to install?
A wattle fence may be the easiest one to install. No complicated tools are needed. Plus, materials are available locally. You can try it out!
How to make a dead hedge?
A dead hedge is made from branches and foliage. They mainly protect young plants by acting as windbreaks. Learn how to make a dead hedge to get all the benefits that come with it.
Conclusion
Fences are an integral part of any property. It comes with many benefits, such as enhancing security and privacy.
Fortunately, you don’t have to spend thousands of dollars. Instead, you can use any of the six DIY tree branch fence ideas described in this article.
We appreciate your time and hope that you have enjoyed reading this article at the Em Offgrid. We encourage you to explore the site for more similar content. Also, don’t forget to share it with your friends.