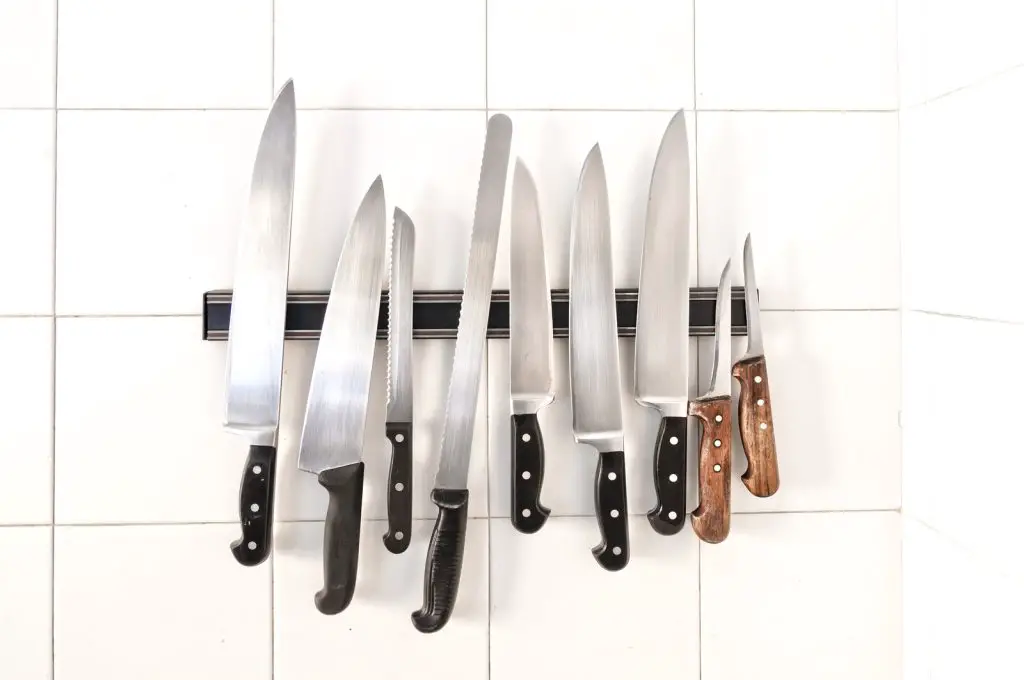
A knife is one of the great tools that we use every day. At least every home owns a knife. In other words, your off-grid living will not be complete without this great tool. There is a need for you to learn how to make a homemade knife.
People use homemade knives for different reasons: some for preparing meals, while others for hunting or self-defense. Whatever you plan to use a knife for, you should learn to make a knife for that intended purpose.
In this article, we provide a step-by-step guide on how to make a knife at home. We have presented different approaches that you will find easy. However, you need to be prepared, patient, and cautious when handling this task.
Contents
Why Must You Learn How To Make Knives?

Sometimes you just need to live away from other people. For you to achieve that, you need to be a handyman. The ability to make knives at home will go a long way in ensuring the success of your off-grid living. But what are the uses of homemade knives?
A homemade knife is an essential tool that has many uses. Think of cooking, creating shelter, hunting, and self-defense; they all require a knife.
However, we have to warn you that making a knife is a painstaking process. You need to dedicate yourself and that is why we have this guide here to help you.
Basic Steps To Make Knife
There are general steps followed when making homemade knives. These steps largely remain the same regardless of the type of knife you plan to make, and they include the following:
Step 1: Choosing Materials
First thing first, you need all the ingredients before you start cooking. Choose the appropriate materials for your knife blade and handles. Do you need to use a rock or steel? If steel, then which grade of steel? The type of material determines the quality of the blade.
The same goes for the handles. You can choose either wood, micarta, bone, leather, cord, stone, gem, or any other material. In this case, we have assumed that you have all the tools and equipment needed to make homemade knives.
Step 2: Design Your Knife
You are better off working from a design. It is a key step in the manufacturing or blacksmithing process. Decide on the shape of your blade and tang. Trace it on graph paper, and ensure the size of the drawing is as close to the actual size as possible.
While designing your homemade knife, keep practicality and functionality in mind. Do not be over-possessed by the appearance of your design, forgetting why you needed the knife.
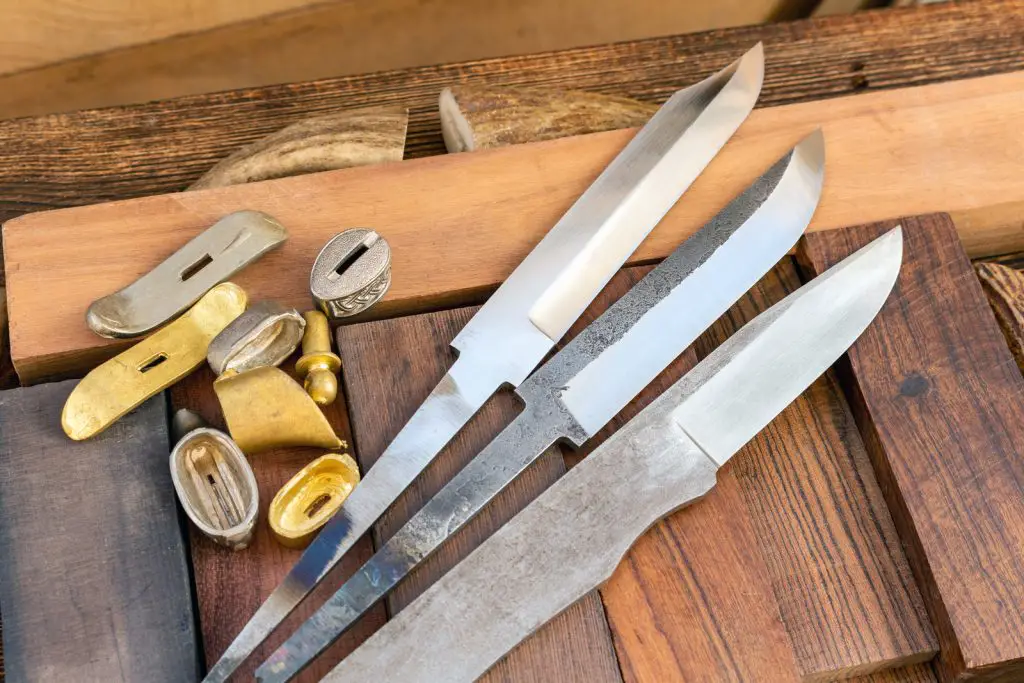
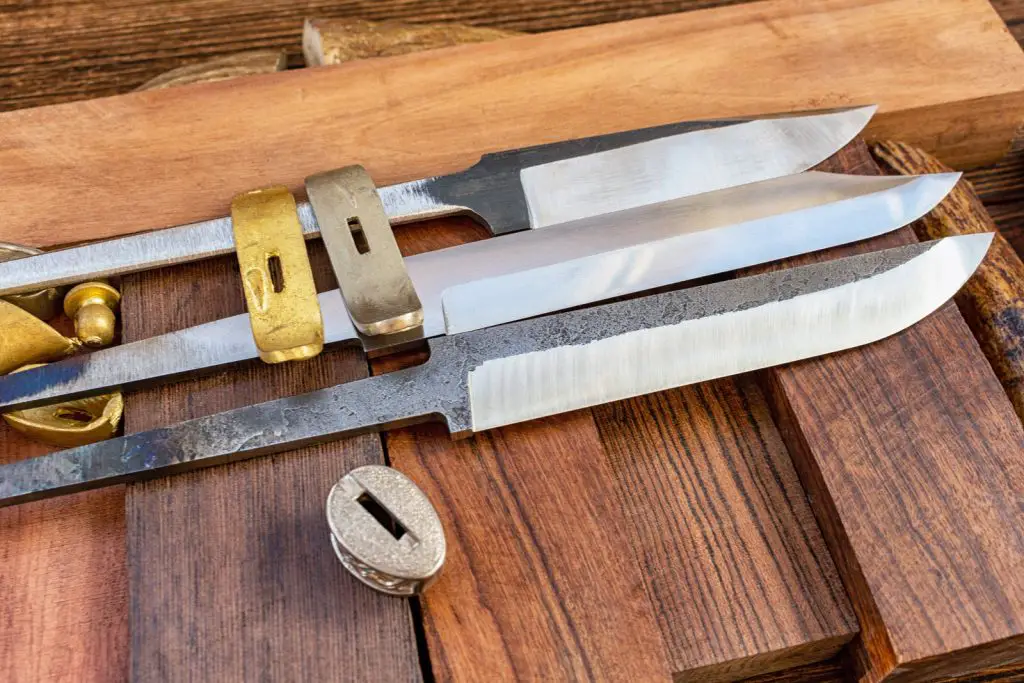
Step 3: Make the Blade
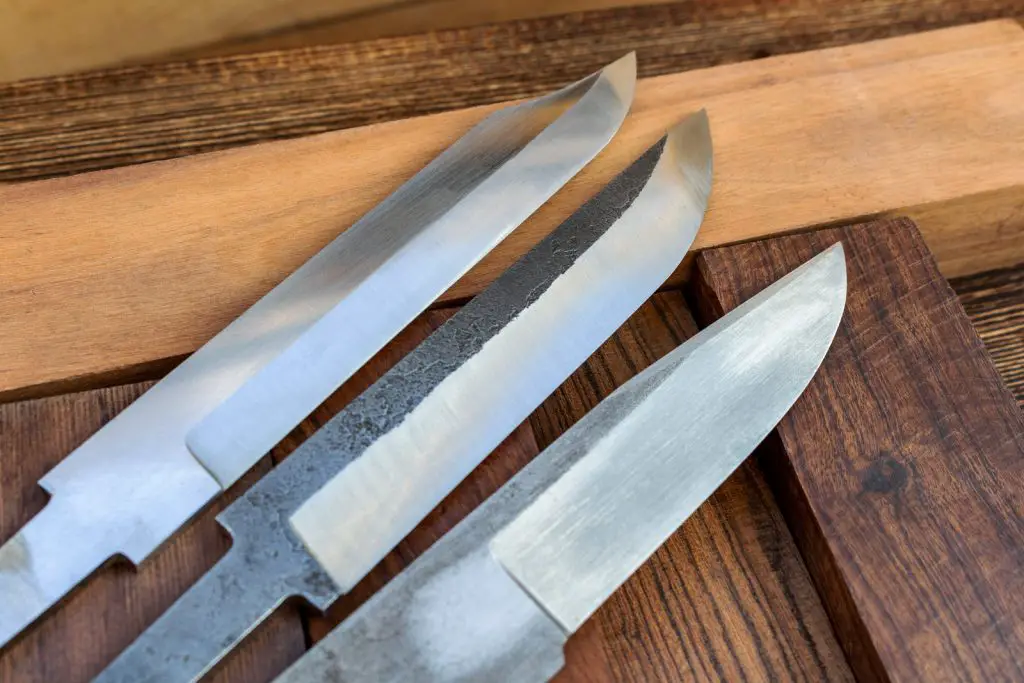
Using a hacksaw or angle grinder, cut the blade and tang from the blade material chosen. Here, we assume that you already have a trace of the knife design on the steel.
Also, make sure you have a clamp to hold the substrate on the workbench and a drill for drilling the holes on the tang.
Step 4: Make a Knife Handle
The knife handle is made following the shape of the tang. Full-tang is the commonly used design because it is easier to work with, but you can try out others such as through-tang.
As you did with blade cutting, trace out the handle on the material and cut it out as appropriate.
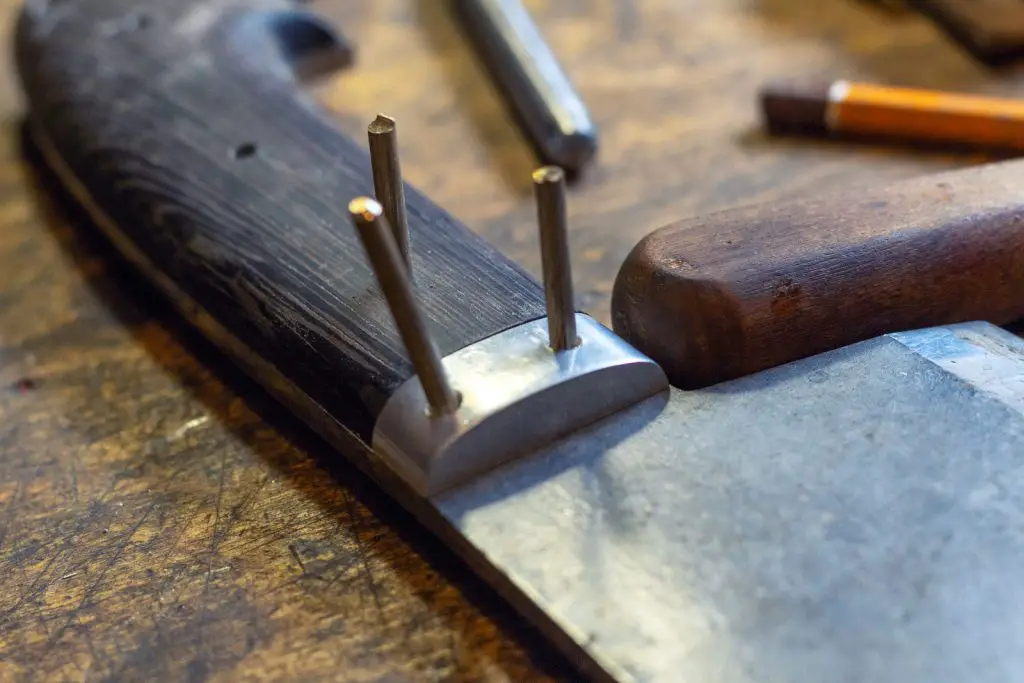
Step 5: Attach The Blade To The Knife Handle
Handles are attached to the tang by riveting. Here, the method of riveting depends on personal choice. Brass rivets are the most common but you can choose what suits your situation.
Once you are satisfied with the handle cutout, drill holes through them as you did on the tang and attach everything together through riveting.
Cap the rivets to ensure they do not come off. You can use glue to further secure the handles in place, but that is optional.
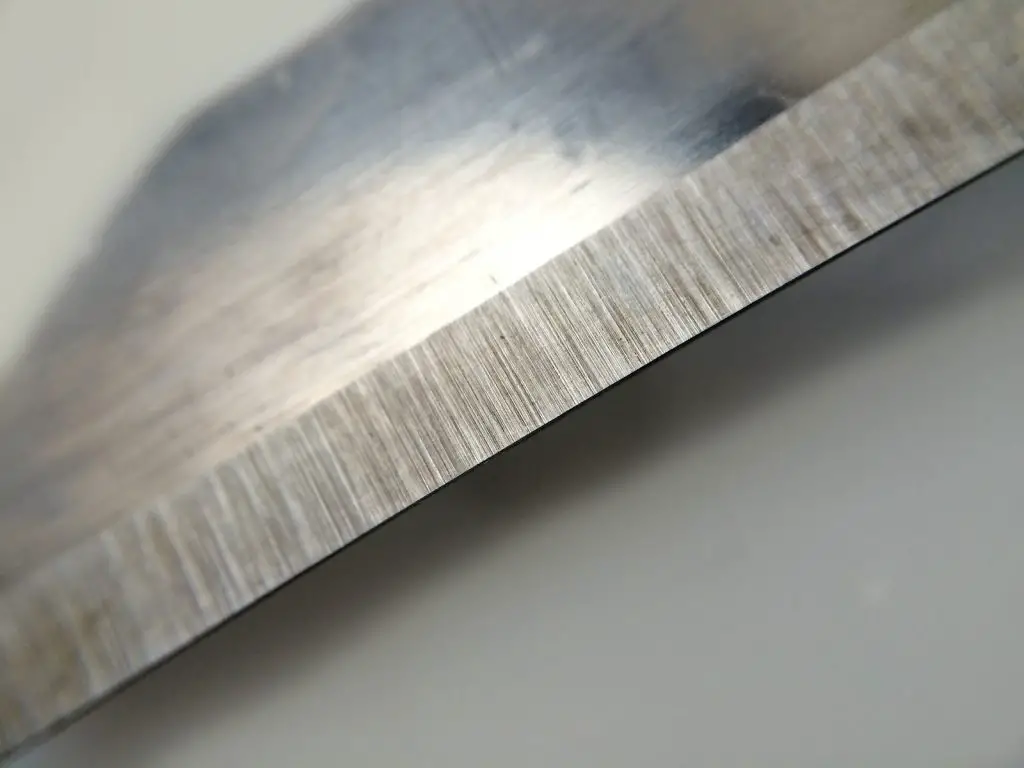
Step 6: Sharpening the Blade
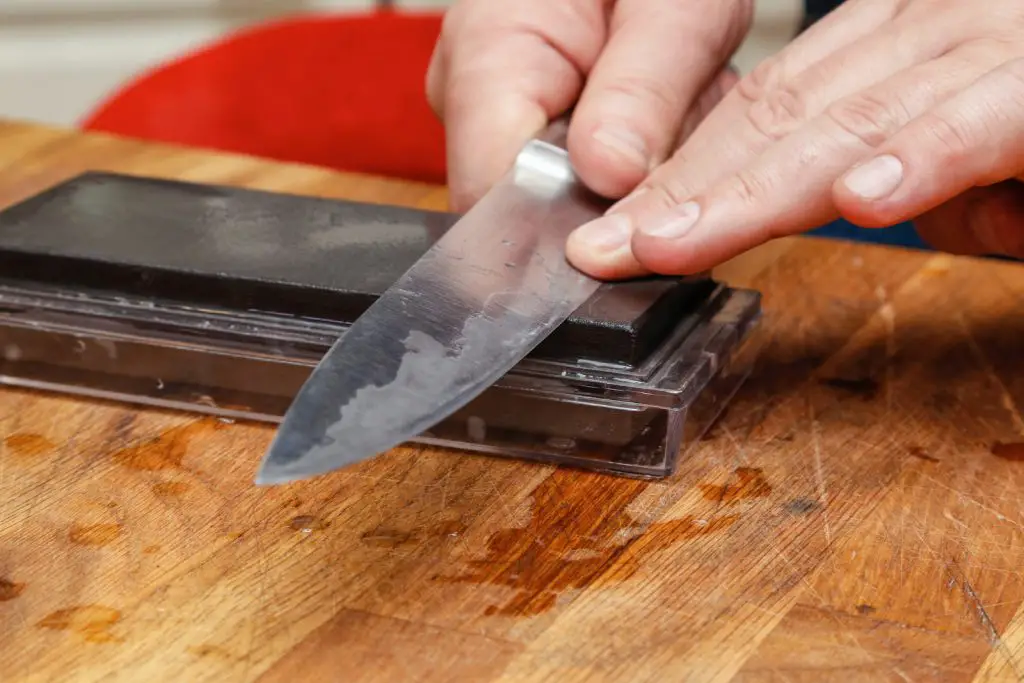
The blade sharpening step should be near the end to avoid injury when attaching to the handle. This is usually done through grinding and/or filing. Use an appropriate grinder or file to achieve the sharpness you need for the blade.
The knife is held at an angle, and long sweeping motions are applied to achieve uniform sharpness. You also need to alternate both sides as appropriate.
We have to say again that this is the most dangerous step where you can get injuries. Sharpening should be slow and continuous.
Step 7: Clean and Test the Knife
This is the last step before declaring your homemade knife ready. The testing method you are going to apply depends on the intended purpose. A hunting knife should cut through meat easily, and for cooking should chop vegetables and other foodstuffs.
You might need to test the knife twice or more before you are satisfied with your work. Remember to clean it thoroughly when you are done with everything. Cleaning can be done using coarse, medium, and fine sandpaper, respectively.
Homemade Knife From Rock
Rocks are very accessible if your off-grid home is located in a rocky area and has been used to make rudimentary weapons since the beginning of the human race. It is only that the art has been perfected in the present times.
The following are the steps needed to make a knife from a rock:
Step 1: Choosing materials
Rocks can be used for making knife blades, but not all stones can be used for this purpose. You can easily find razor-edged ones in a creek. However, it has to be a particular rock. Quartz, obsidian, flint, chert, and chalcedony are some of the best stones for blades.
Rocks make a ringing sound or sound like glass when hit together. That is an indication of good blade material. Make sure to choose ones that are relatively large for better blade formation.
Step 2: Design Your Knife
You do not necessarily need to design the blades on graph paper for rock knives. That is because you cannot predict with accuracy the direction the rock will break. However, you should just have the image of the blade in your mind and let fate decide the rest.
Trying to force a particular blade design on a rock can be so disappointing and time-consuming. In many cases, this can lead to frustrations, making you abandon the project. Just form the shape in your head, and that is all.
Step 3: Make the Blade
Making a rock blade is a daunting task. You need to really let yourself free and accept anything that comes out of it. There are two methods for approaching this task: bi-polar percussion and direct percussion.
Both methods involve striking the chosen rock with a hard hammer rock. You are advised to wear your protective gear such as gloves and eye protection wear. Gloves should be made of leather material.
Bi-polar Percussion
In this method, put the chosen blade rock on another large and stable rock. This acts as the anvil and offers an opposing force when striking it. Put the blade rock on this stand rock while standing on its longest axis.
By doing so, you allow the propagating wave from the strike to follow an efficient path.
Use a hard hammer stone and strike the blade stone. The hammer stone should be at least four times larger than the rock you intend to break. You might need to try this process with other rocks before getting a nice, flat, and sharp stone blade.
Direct Percussion
This approach does not require an anvil. Instead, you will select a piece of rock with the same size and width as a sandwich to be your blade stone. Choose another bigger one that should be as round as an egg to be your hammer.
Hit the stone blade with the hammer at the right edge. Follow it with a series of strikes as if driving a nail into the wood. If the strikes are hard enough and precise, you should have sharp flakes of stones to be the blade.
Step 4: Make a Knife Handle
You can use antlers or wood handles that are easy to shape using a file, a belt sander, or just a saw. Decide on what the handle will be for your stone knife. We have antler, Osage wood, and jaw bone as the preferred materials.
Cut the handle in such a way that it will fit the blade. Use a vertical saw to cut holes through the chosen material. If you are lucky, you can find some jawbones that are already slotted. In all these steps, ensure the handle has a tight fit because that is the best.
Step 5: Attach The Blade To The Knife Handle
The handle can be secured to the blade using a cloth or a rope. Alternatively, animal hide glue or any other adhesive can be used for the same purpose. You can also try out pine glue for blade attachment.
The attachment method will depend on the handle design. Socketed design only needs glue, while slotted require wraps of the gut to ensure everything holds.
Notes: Avoid getting glue on the blade because it can be difficult to remove/clean.
Step 6: Sharpening the Blade
Stones are usually used to sharpen knives. In this case, the knife itself is a stone. Stone knives are naturally sharp, and the sharpness depends on the method used to make the blades. However, you can still improve it if needed.
Use a table saw, belt sander, files, and sandpaper to achieve the blade thickness and sharpness you desire.
Notes: If the blade from the rock is too thin, it is easy to break and chip. Such knives are suitable for survival situations.
G10 Handle Material, Knifemakers Supply Custom DIY Tool of Micarta Knife Handle Material
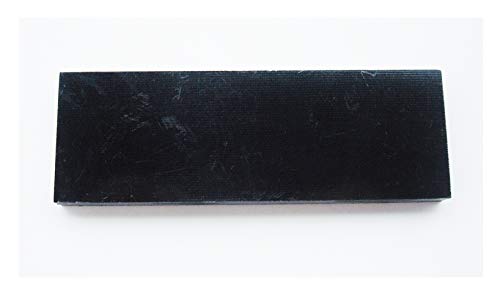
- Material: G10 Micarta Laminate Slabs
- Size:120x40x8mm
- It is very dense, lightweight, and impervious to water. Makes for a very tough and durable handle material.
Homemade Knife From Steel
Step 1: Choosing materials
Unlike stones that require trial and error, steel for the blade is sold in specific grades. You only choose what will work well for your blade design. Carbon steel such as .01 is the most preferred for knife blades. Do not go for stainless steel.
Stainless steel is not recommended because of the complications in the blade-making process and does not make a good blade. Go for a carbon steel bar of about 1/8 to ¼ inch thickness.
Step 2: Design Your Knife
The blade design is best done on graph paper. Decide on the shape and length of the blade and then draw it. As mentioned earlier, try to make the drawing to be the same size as the actual knife. That will make it easier for you when tracing the shape on the steel.
Note: You need to mind the size of the knife. More steel is required for large knives, which can also be heavy.
Step 3: Make the Blade
Use an appropriate method to cut out the blade from the steel following the shape traced. An angle grinder or a hacksaw is the best tool for the job. You need protection during this process. Wear gloves, jackets, and glasses to protect your eyes.
Drill rivet holes where you will attach the handles. The drill bits used should be the same diameter as the rivets you plan to use. You might need to file or grind the cutting edge at this point, but make sure the blade does not become sharp.
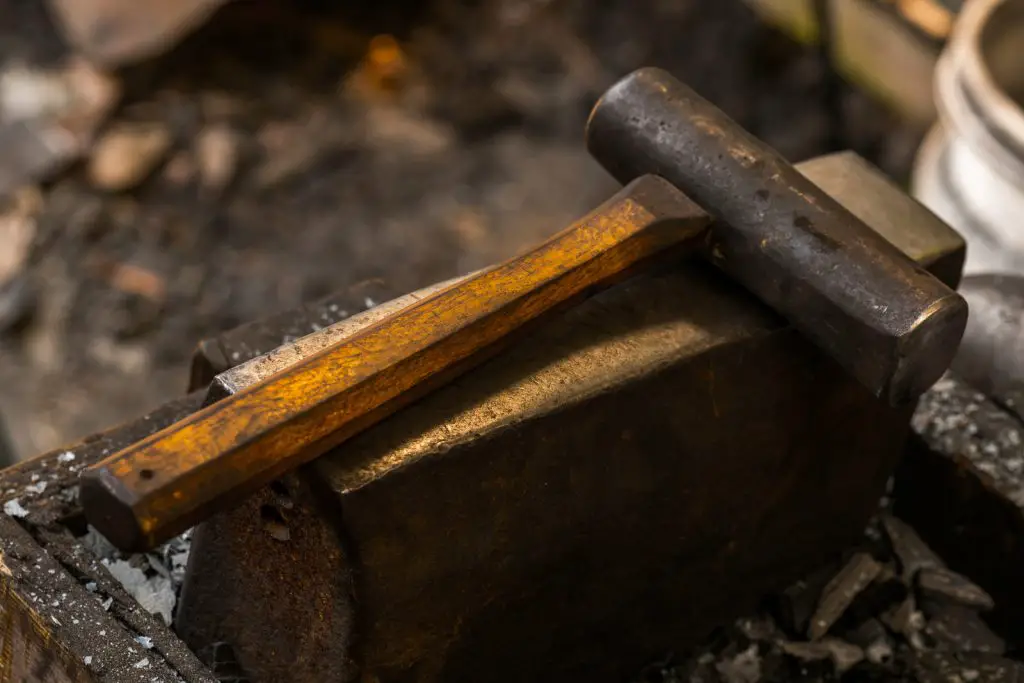
Heat treatment is the last step in blade making. Use charcoal or any other heat source and heat the blade until it turns orange. Continue heating for a few minutes and then cool it in a warm oil bath to harden.
Step 4: Make a Knife Handle
Cut two pieces of wood following your handle design, one on each side. Sand the pieces at the same time and drill rivet holes through them.
Step 5: Attach The Blade To The Knife Handle
Use rivets to attach the blade and handles together. You can also apply epoxy and let it dry overnight.
Notes: Avoid getting epoxy on the blade because it can be sticky and hard to clean.
Step 6: Sharpening the Blade
Blades are a bit harder to sharpen after heat treatment, which is an indication that the hardening process was a success. You can use a sharpening stone, file, grinder, and sandpaper.
Choose an appropriate grit from 60 to 220. You can also use a sanding wheel and power drill to save time.
RECHERCHE 1pcs Knife Handle Scale Slabs Grips C-Tek Resin Knives

- C-Tek Resin material
- Sold as 1PCS. Size is 120x40x8mm
- Color: Black
Consider The Necessary Equipment
Depending on the method and materials, you may consider the following equipment:
- Angle grinder or any other grinding tool you can access at home with a set of grinding discs.
- Small drill press and/or electric drill.
- Flexible disc for sanding. You are better off choosing the one designed for both wood and metal. The sticky-back discs are mostly preferred.
- Wood rasp if you need to rough-shape handles.
- Holding tools e.g clamps and bench vice.
- Scribe for tracing blade shape on the steel.
- A brick or stone-lined fireplace or forge for heating steel knife blades.
- Hammer
- Hacksaw
- Blade material (steel or wood, depending on the knife to be made)
- A pair of tongs (two pairs)
- Handle material (wood or Micarta, whichever preferred)
- Sharpening tools e.g file, stone, and sandpaper. (coarse, medium, and fine)
- Wire for pins – any wire you can find.
- Safety gear e.g masks, fire extinguishers, gloves, goggles, etc.
Personally Thinking
The finishing or how you will handle your knife after it is made depends on you. In my opinion, painting and adding stickers can improve its appearance. Depending on the size, I can attach it to a keychain or make a sheath for it.
That way, I can carry my knife around with me.
Safety

You need to stay safe when working on a knife-making project. Protect yourself by wearing gloves and glasses or goggles to protect your hands and eyes.
If power grinding, wear a respirator and hearing protection
Conclusion
You are the designer and maker of a homemade knife. That makes it possible to customize designs, size, material, shape, and other features. However, making a knife is still a challenging task.
Do not slam yourself when it does not come out as you expected. The more you practice, the better you will be.
As always, thank you for caring for ”Em offgrid” in your life! If you are reading this article of ours, thank you, and we hope you have found the information useful.