An off-grid living can sometimes refer to depending on your skills, including making your own clothes.
If you are a hunter or you have kept livestock such as goats and rabbits, then you can get a hide or fiber from them when slaughtered. Tanning rawhide is necessary to preserve it and make it useful.
Animal hide, if not tanned, can quickly decompose, leaving you with nothing to wear. The tanned rawhide is water-resistant and does not decompose.
In this form, it can be used for making clothes, bags, hats, and shoes. This is ideal to complement your off-grid lifestyle.
In this article, we will learn everything about brain tanning. We will explore what it is and how to do it. Keep reading to learn how to do it.
Contents
What is Brain Tanning?

Brain tanning is the process of turning rawhide from animals into leather using the brain solution. This process has evolved over time. Before machines that are now used in the leather-making process, brain tanning was done entirely by hand.
Tanning processes remove excess moisture from rawhide. It emulsifies brain tissue and water in the hide, making it wearable, water-resistant, and preserves it. The formed leather can last for decades without decomposing.
SZCO Supplies 5Pc Skinning Knife Set
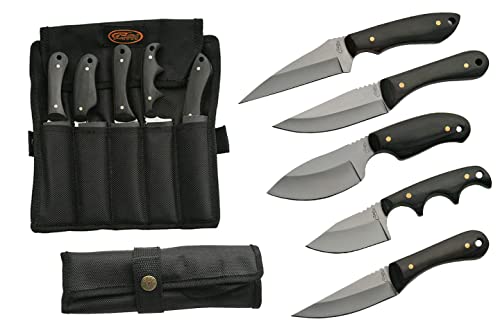
- 6,6.25,5.5,5.5,5.0 inches in overall length
- Stainless steel blades
- Pakkawood handles
Common Tanning Methods
Leather tanning can be achieved through different methods, depending on what works for you. These methods have their advantages and disadvantages you need to consider when making the decision. The commonly used techniques include the following:
- Bark Tanning
- Brain Tanning
- Tanning w/Mayonnaise and Raw Eggs
- Tanning w/Alcohol & Turpentine
- Salt & Alum Tanning
- Chrome Tanning
- Glutaraldehyde Tanning
- Lard and Flour Tanning
Overview Of How To Tan A Hide By Brain Tanning

The brain tanning method involves definite steps. These must be followed, one after the other, if you want to get the results you deserve.
Additionally, each step must be completed before going to the next step for high-quality leather. Brain tanning is done as follows:
- Assess your hide and remove unnecessary edges.
- Scrape off the flesh.
- Soak the rawhide in water or bucking solution.
- Remove grain and membrane.
- Squeeze moisture from the hide.
- Use braining solution.
- Squeeze hide again.
- Apply braining solution and squeeze again.
- Soften your hide.
- Smoke the formed leather to preserve it.
Benefits of Brain Tanning

Brain tanning makes the leather very soft and supple. Additionally, brain-tanned leather is more comfortable, durable, and breathable. This method is relatively cheap because you do not need to buy expensive chemicals.
However, this method cannot be used in the mass production of leather because it mainly relies on hunted animals rather than farmed ones.
The appearance of brain-tanned leather depends on the actual method used and the animal where the hide was derived. You can remove fur or not. Also, you can dye the leather to get your favorite color.
What Do You Need For Brain Tanning?
To successfully turn your leather through brain tanning, you need to prepare for it. Assemble all the things you will need in the process, and they include the following:
- The Hide – Can be from a deer, sheep, goat, or any other animal. It can be fresh, salted, dried, or frozen.
- A Scraping Beam – Can be made from a hardwood log or a vinyl pipe.
- Scraper – Any old and dull planer blade can do the work pretty well. Just make an appropriate handle for it.
- A garbage bag for keeping wastes.
- An apron to wear.
- A plastic bucket for soaking the hide.
- A sharp knife.
- A ¼ cup of olive oil or rendered bear fat.
- 5 feet steel cable of 1/8 inches.
- 2 Cable Clamps
- 3 beading needles and beading thread.
- Wringing Beam – Can be 2 wooden poles lashed to two trees.
- Wringing Pole – Can be wooden poles of 2-3 inches in diameter and 3-5 feet long.
- 5-15 gallons of half-rotten wood. This can be used together with fir boughs.
- Tanning Solution
How To Make A Brain Tanning

Skinning
This is the first step in tanning. It involves obtaining the hide from the slaughtered animals. For Brain tanning, hunted or game animals are preferred, but you can also use farmed animals. Skinning should be done carefully to remove the hide in one piece.
Assess the hide for any holes and knife marks on the gray layer between the flesh and skin. You should discard the rawhide with holes unless you want to make lashing leather. The next step is to trim off edges with dangling hides. Thick sections usually from the neck should also be removed.
You are removing these areas because they will make your work more difficult. Also, ensure your hide is of high quality for quality leather after tanning.
Fleshing
After skinning and hide inspection, you need to start fleshing the hide. Spread it on the beam, ensuring that it is fully stretched. Scrape off any flesh from the rawhide.
This is a very delicate process that should be done carefully. Otherwise, you can damage the hide by puncturing holes into it.
After a successful fleshing, you need to soak the hide in a bucket of water or bucking solution.
You should add weight to the rawhide to ensure it is fully submerged into the water and leave it to stay for one to three weeks. You can use warm water to hasten the process.
Soaking the skin is necessary to loosen the fur and make the membrane layer softer. In other words, it is a controlled rotting process that you should monitor. You also need to turn the hide at least twice a day for the uniformity of the process.
De-furring
Your hide is ready for de-furring when it begins to slip on your hands. This is where the real hard work of brain tanning begins.
Clamp it and thoroughly scrape it to remove the hair, the follicle, and the outer layer of the hide. This process is challenging, but it should not be impossible if soaking was effective.
De-furring can be optional in some cases if you want the formed leather to have furs. But in most cases, it is recommended to remove them.
This should be done carefully and perfectly. No patches or streaks of grains should be left on the hide.
Patches and streaks of grain can dry and stiffen, making it difficult for the brain to penetrate into the hide. This will make the subsequent steps challenging and can lower the quality of leather that will be formed.
Remove Membrane
An animal skin comprises different layers, one of which is the thick layer that we are interested in. From the previous step, you had already removed the outer layer with hair follicles.
Now, the next step is to remove the membrane. This does not depend on whether the hide is dried or not.
You should soak the hide again before carrying out this step to make it easier to remove the membrane. With the appropriate scraping tool, remove this inside layer of the rawhide. But again, you need to be very cautious when doing it.
Wringing
Wringing is a step that helps in breaking down the mucous membrane. If done as it should, it makes the hide soft with just appropriate moisture content.
It involves holding the rawhide on one end and fixing the other and then twisting it around. After this step, your specimen should be soft and pliable.
Wringing should aim at removing as much water as possible. Wet spots on the hide will lower the quality of the formed leather.
Stretching
This step is optional but recommended. After wringing, your hide might be having wrinkles and other folds. To remove them, just stretch the rawhide. You can use pegs to hook it after spreading it flat.
Dual Plate Hide Scraper Flesher Hide Tanning Kit

- SCRAPER SKINNING KIT: The Redneck Convent Hog Flesher Pelt Scraper is easy to use for cutting and pushing membrane and fat from animal hide and for last minute detailing; The metal scraper wheels works well in conjunction with a fleshing knife, a wooden or PVC fleshing beam, and hide tanning solution
- IDEAL FOR DETAILING: Designed for trappers who are looking for efficiency and ease when tanning, these flesher skinning tools provide 2 sharp blades that allow you to detail delicate areas like edges and limbs on small and large animal hides
- STURDY WOODEN HANDLE: The heavy-duty 4.2-inch (10.6 cm) wooden handle provides a sturdy, yet comfortable grip to pull or push in smooth, even strokes for ease when working; Attach 1 or both wheel blades to the handle for optimal use
Brain tanning
This is a crucial step that will turn your hide into leather. You need to prepare a tanning solution.
In this case, we will use a brain tanning solution, but other solutions work as well. The fats and lecithin in the brain make it possible to turn a rawhide into leather.
To prepare a brain solution, you need the following:
- 1.5 gallons of warm water (the water should feel comfortable on your skin.)
- 1 pound of the brain (this can be the brain of the slaughters animal.)
- ¼ cup of olive oil or rendered bear fat or other oils.
Mix these ingredients and dip the hide into it. Again, make sure every part is submerged into the solution. Stir the content together until your rawhide is fully saturated. Let it stay for 1-12 hours, depending on the thickness of your hide.
After soaking, remove the hide and twist it to squeeze out the solution from the rawhide. You can also use a wringing pole to do this.
Soak it again in the brain solution and wring. Repeat this process about two to four times. This depends on the hide and quality of leather you want.
The repeated actions of soaking and wringing allow maximum brain solution to penetrate through the hide. This means you need to do it as many times as you possibly can.
Soften Your Hide
Softening is a very crucial stage to prevent the formed leather from hardening as it dries. This is usually done by hand.
The aim is to keep the fibers moving as they dry. It is a rigorous and time-consuming process, but a worthy one in that matter.
Start the softening process by pulling the leather apart from all edges. Also, do this along the longer dimension.
This should be a repeated process consisting of stretching, cabling, staking, bouncing, rubbing, and smacking. These moves should be repeated until the leather has dried.
Smoke To Preserve Softness
Smoking is the last step in turning rawhide into leather. It is to make it soft in any weather.
The white color of your hide might be attractive, but it is not ready for water yet. It will immediately harden when it touches water. Smoking will discolor it, but you can dye it later.
Temporarily stitch your hide into a bag with an open end, ensuring the side where you scraped the hair is on the inside. Next, attach a cloth to the open end of the leather to form a funnel that will collect smoke from your stove.
Prepare coal by burning wood blocks or firewood of sizable diameter. Transfer the coal formed into your stove and add the rotten wood chunks to produce thick smoke. Hang your leather with the clothes stitched on it to channel smoke through it.
Smoke the hide for about 30 minutes to three hours and then turn it inside out. Again, smoke the membrane side for a further 30 minutes to three hours. Your leather should be ready for the intended use.
Dyeing Skin Color
Dying is the final step to give your leather its final color. Make natural leather dyes of your choice to change the color of the finished product.
What To Pay Attention To At Home Tanning
Tanning rawhide at home can be an unsafe process if you have no experience. To ensure safety, always wear gloves, apron, and gumboots and wash them after use. Be cautious and avoid injuries to yourself and to the second party.
Tanning rawhide at home needs skills. If doing it for the first time, then start with small pieces of rawhide and monitor your progress regarding the leather quality. You can then advance to larger hides after perfecting your skills.
The quality of leather formed through brain tanning depends on the animal where the hide was derived from.
So, you do not have to worry if you notice any difference if you did your work as appropriate. Hunted animal hides are better for leather formation.
Conclusion
The brain tanning method for leather making is quite cumbersome but not possible. You only need the patience to get the result you expect.
The tanning steps described in this post should apply to most animals. However, you should not hunt or slaughter animals that are protected by state laws. Breach of this can attract hefty fines.
As always, thank you for caring for ”Em offgrid” in your life! If you are reading this article of ours, thank you, and we hope you have found the information you needed.