If you have ever tried your hand in baking, you must have come across the word yeast, but did you know that you can capture yeast from the surrounding air? “How To Make Yeast” is an essential culinary skill you may want to learn if you spend some time in your kitchen.
You like a recipe often and want to give it a try, but you find that your key ingredient, yeast, is missing. Instead of running to the supermarket, why not become self-independent and never run out of yeast when needed by preparing it at home with natural ingredients.
This article shall cover all things that you would like to know about making yeast at home. You will learn about some interesting health benefits of natural yeasts, how to easily make yeast at home, preserve it and use it correctly to make delicious and healthy recipes.
Contents
What Is Yeast?- Industries That Use Yeast
The word ‘Yeast’ is most widely used in food production and brewing, but what is it actually? Yeast is a unicellular microorganism belonging to the fungus kingdom with more than 1,500 known species.
Yeast metabolizes sugar and creates two byproducts: carbon dioxide and alcohol, known as fermentation. These two byproducts are an essential tool in the food and brewing industry.
While carbon dioxide is responsible for leavening action (rising of the dough and creating bubbles), alcohol adds flavor to the product. Due to this special characteristic of yeast, its application can be widely divided amongst several industries like
- Brewing alcoholic beverages include beer, wine, cider, and spirits (vodka, gin, whisky, rum, brandy, etc.).
- Food processing like bread, baking, flavoring, etc.
- Medicinal applications like vitamin supplements, insulin, etc.
Some Popular Yeasts and How To Make Yeast At Home
“Saccharomyces cerevisiae,” a Latin Greek which means “sugar fungus,” is a species of yeast that is most common in the world. This family of yeasts includes baker’s yeast and brewer’s yeast, which are both used to produce bread and alcohol.
The beginning of harvesting and culturing yeast may be related to ancient Egyptian culture 1,000 years ago. Making yeast is not rocket science. It just needs the right process and environment.
Yeast needs food, water, oxygen, and the right temperature to grow. They are generally dormant in cold temperatures (around 34°F) and get activated at around 50°F. The ideal temperature for yeast to feed and reproduce is around 70°F to 80°F.
There are three main types of yeast that are used both commercially and at home.
- Compressed Yeast: They are available in the form of moist cake of active yeast cells and are used mostly in commercial applications. These yeasts are highly perishable and need proper storage.
- Dry Yeast: They are dried yeast cells in a dormant state which can be stored at room temperature for months. These yeasts are available in two forms:
- Active Dry Yeast: They are in dry granular form that needs to be rehydrated before using.
- Instant Yeast: They are available in vacuum-packed fine powder form that activates very quickly and is very popular for bread making.
- Natural Yeast: They are homemade yeast prepared from natural products like fruits, cereals, etc.
Common Steps To Make Yeast
A lot of people believe that yeast is something that must be purchased from a shop. However, they don’t realize that our ancestors made it at home when supermarkets had no existence. You can cultivate natural yeast at home using simple ingredients.
Many scientific studies have proved that natural yeast has many benefits. Because of its nutritional composition, homemade natural yeast improves your immune system, boosts up your energy, and provides many other health benefits.
So, why not try to grow your own yeast at home? Once grown, you may dehydrate it to make dry yeast or just use the starter for baking your own bread.
In general, any homemade yeast requires four simple steps:
- Clean and add the ingredients to a container.
- Add sugar or honey and shake it well to assist fermentation.
- Cover the container and keep the mixture in a warm area away from direct heat or sunlight.
- Allow 3 to 4 days of time for the yeast to culture and cultivate.
Let us now look at some simple ingredients that can be used to make natural yeast at home.
- Yeasts from fruits.
- Yeast from potatoes.
- Yeast from cereals.
- Yeast from water.
Choose the item that best suits you, depending upon the locality and availability of the things.
Before exploring detailed steps, this is one of the off-grid DIY articles in our DIY series. You can check the full series here.
Now, let’s learn how to make yeast from each of these items in detail.
Yeast From Fruit
The wild yeast on the skin of various fruits can be captured and used for many home recipes. Fruit-based yeast is mostly used in making bread at home.
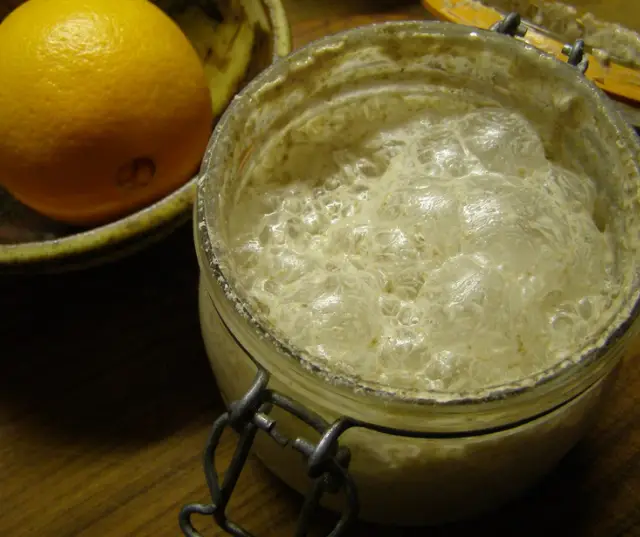
You can use any fruit like apple, orange, grapes, etc., to make yeast. It adds an aromatic flavor to your recipe, be it a pie or just bread.
Materials Required:
- Clean Glass Jar
- Water (Tap or Filtered)
- Fresh Fruit
Note: While you can use any fruit for making yeast at home, you should avoid pineapple and kiwi as the end product is not very good.
Step-by-Step Instructions To Make Yeast From Fruit
- Cut and put the fruit / dry fruit in the glass jar.
- Add one tablespoon of honey or sugar to facilitate fermentation.
- Fill ¾ of the glass jar with water.
- Place the lid on glass jar but do not tighten it very firmly.
- Place the glass jar in some warm place at a constant temperature.
- Stir the mixture daily once for the next 48-72 hours.
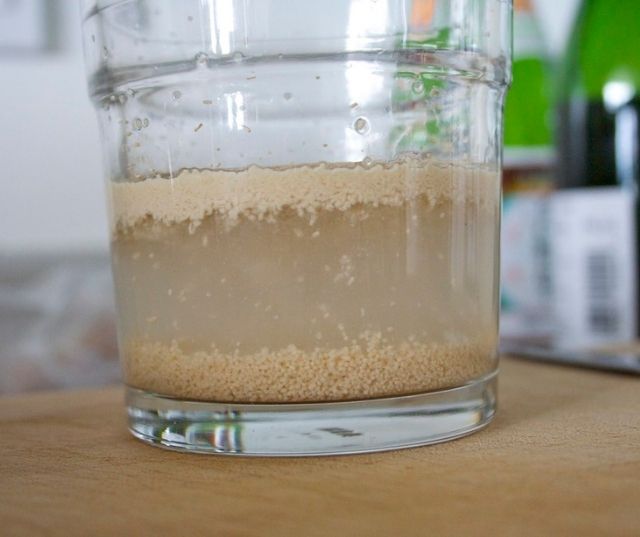
- When you see bubbles forming at the top, and the mixture starts smelling, your yeast is ready.
- Place your home-made yeast in the refrigerator and use it as required.
Yeasts From Potatoes
Potato is another readily available ingredient at home that can be used to make yeast. Potatoes are abundant in starch, which makes them suitable for yeast culture.
They also include a lot of micronutrients, which makes them a better yeast starter than just sugar. However, yeast cultivated from potatoes works a little slower than that made from fruits.
Materials Required:
- Clean Glass Jar
- Water (Tap or Filtered)
- Potatoes
- Sugar
Note: If the chlorine content in your water is high (especially in the case of supply water), it will affect yeast cultivation.
Step-by-Step Instructions To Make Yeast From Potatoes
- Clean the potatoes and cut them into pieces.
- Boil the potatoes to make them soft.
- Drain the water in another container. Don’t throw this water.
- Mash the potatoes.
- Add one tablespoon of sugar to the mashed potatoes and mix nicely.
- Allow the mixture to cool down to room temperature.
- Now mix the drained water and mashed potatoes in the glass jar.
- Stir the mixture and cover the lid, not very tight.
- Keep the glass jar in a warm place for 24 hours.
- When you notice the bubbles, the yeast has started cultivating.
- Store it in the refrigerator and use it when you prepare your next dough.
Yeast From Cereals
Yeast is already present in cereals. All you need to do is to cultivate them in a few simple steps.
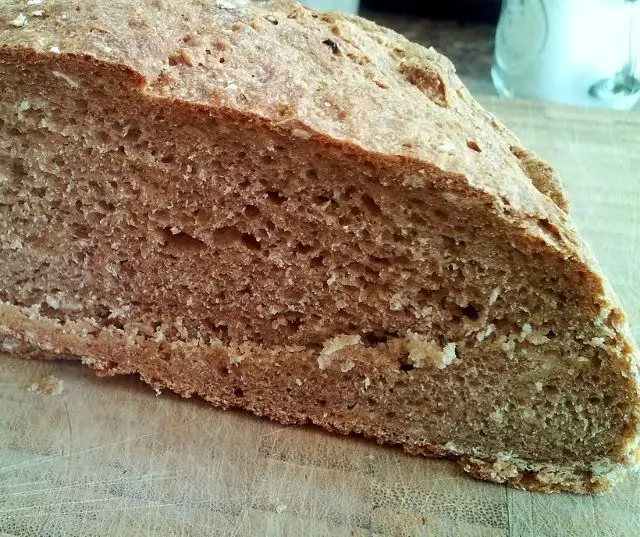
Note: You can bake bread using cereal yeast, making the bread rise slowly so that it will have more nutritional benefits compared to a fast-rising bread with cultured baker’s yeast.
Materials Required:
- Clean Glass Jar
- Water (Tap or Filtered)
- Cereals like wheat, maze, etc. (You can also use flour)
Step-by-Step Instructions To Make Yeast From Cereals
- Add cereals to the glass jar.
- Add one tablespoon of honey or sugar.
- Fill ¾ of the glass jar with water and mix the mixture firmly.
- Loosely close the lid on glass jar.
- Place the glass jar in some warm place for 48-72 hours.
- You will see some bubbles getting formed at the top with some odor. This confirms that the yeast is ready for use.
- Store the freshly prepared yeast in the refrigerator.
Yeast From Water
Yeast water is another way of capturing and cultivating the wild yeast present in the environment. The best part of yeast water is that it does not require regular feeding. You can use it directly in a recipe without the need for any starter process.
Materials Required:
- Clean Glass Jar
- Water (Tap or Filtered)
- Fry fruit like raisins, figs, apricot, etc.
Note: Generally, sulfur dioxide is used to preserve the color of dry fruit. So, it is essential to use unsulfured dry fruit as sulfur causes some health problems.
Step-by-Step Instructions To Make Yeast From Water
- Add dry fruits to the glass jar. (You can use either one dry fruit or a mixture of different dry fruits.)
- Add one tablespoon of honey or sugar to assist in fermentation.
- Fill ¾ of the glass jar with water and mix the mixture firmly.
- Cover the glass jar with a muslin cloth or loosely close the lid of the jar.
- Place the glass jar in some warm place away from direct light or heat.
- You will have a jar full of bubbly yeast water in less than a week.
- Strain this yeast water through a fine-mesh strainer in a clean jar.
- Store in refrigerator and use it directly in your recipe.
How To Use Your Homemade Yeast
Now that you have learned and made your yeast, you need to know the correct way to use it. You should know these two basic things before you start using homemade yeast.
- Remember, this yeast is homemade and wild. The time it will take to rise may vary and can be more than commercial yeast.
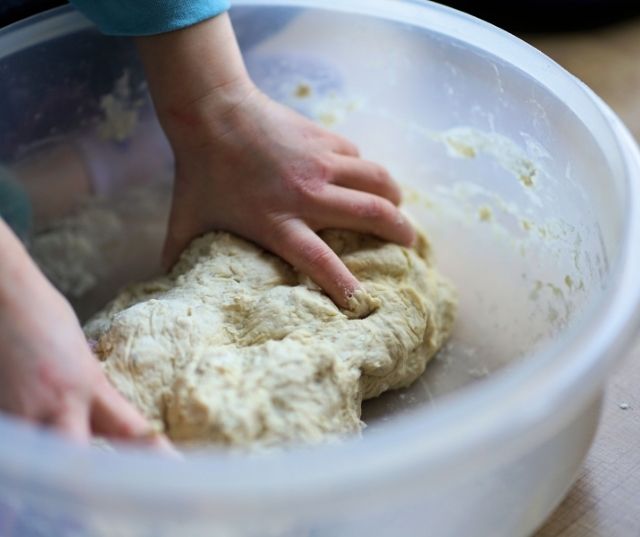
- Prepare a small portion of prepared yeast starter with some flour. Leave it for 2-3 hours. As soon as the mixture appears bubbly, it is ready for use.
- Alternatively, you can replace a portion of the water you add in preparing your dough by directly adding the yeast prepared from any of the above recipes.
Important Tips For Making Yeast
- Never use hot water. It will kill the microorganism. Lukewarm water is the best choice for yeast cultivation.
- Yeasts feed on sugar, but that doesn’t mean that you will double the sugar content. This will not work.
- Salt restricts yeast cultivation. So, never let yeast come in direct contact with salt.
- You can use some dry yeast with yeast water to speed up the process.
- Maintain an optimum temperature of 70° to 80° for proper feeding and cultivation of yeast.
- Never mix yeast made from two different ingredients together. It may spoil your recipe.
- For safety and hygiene, use clean tools and ingredients.
- Store and take proper care of the yeast for better results.
- Discard the yeast if it is too old and stinks badly.
How To Proof Yeast
Many times, you must have heard that you need to proof your yeast before using it in a recipe. But what exactly is proofing of yeast, and why do you need to proof your yeast?
Proofing of yeast is basically a process to confirm that your yeast is fresh and active for use. It is important to proof your yeast in order to save time and effort.
If you don’t proof the yeast, there is a chance that if the yeast were killed due to hot water or any other reason, your recipe might fail, and all your efforts will get wasted.
You can proof your home-made yeast by following these simple steps:
- Take lukewarm water or milk and mix 1 or 2 teaspoons of sugar.
- Add your homemade yeast and give a gentle stir.
- Set the mixture aside to proof for some time.
- You will observe tiny bubbles on the surface, and they will start smelling like yeast.
This process confirms that the yeast is active and ready to be used in the recipe.
Note: You can use your smelling sense to determine if your yeast is ready or has failed. A strong, pungent smell indicates that your yeast has failed.
Taking Care Of Your Yeasts
All the yeast we have learned to cultivate above is actually a starter until it is dried and stored. Starters need to be fed regularly to keep them active and growing.
Feeding a starter means adding sugar, starch, and water to your homemade yeast. If you store it at room temperature, you need to feed it daily, while if you refrigerate it, feeding can be done once a week.
Note: If you are not going to use the homemade starter regularly, you should dispose of a cup of starter while feeding to maintain a ratio balance.
Drying Your Yeast For Storage
You may face a practical difficulty with homemade yeast, which is its storage. While you can refrigerate your homemade yeast and keep it for several days with regular feeding, but it is better to dry and store it for a longer time.
To dry your starter, spread a very thin layer on a cookie sheet and dehydrate it. Dehydration can be done by covering the spread with a muslin cloth and drying it in hot conditions. Once the yeast is dried, you can crumble and store it in an airtight container.
Note: You have to dry the yeast and not cook it. Cooking will kill the microorganism, and it will be of no use.
Benefits Of Using Yeast
If you are under the impression that yeast is only used in food processing and brewing, then you may be surprised to know that yeast has many nutritional benefits. It is gluten-free, sugar, and soy-free, which can be consumed by health freaks and people with food sensitivities.
Here are some nutritional benefits of natural yeast which you may not be aware of.
- It is rich in vitamins and minerals which assist in tissue repair and muscle growth.
- It also contains amino acids and is a complete protein source.
- High beta-glucan fiber found in natural yeast reduces cholesterol level and supports the immune system.
- Natural yeast is also known for boosting energy levels and metabolism.
- They are also considered as good antioxidants.
Final Thoughts
Creating and cultivating yeast at home is easy and doesn’t need much time or effort. Knowing its additional benefits, why not welcome it as a key ingredient in your kitchen.
Now that you know some of the methods to make natural yeast at your home, give it a try. You may come across many other methods which are easier and more comfortable.
There is no need to worry about failure. Use any methods and share your experience of making homemade yeast.
Hope that you will find this article useful and you could benefit from the information shared with you. Do share your thoughts on this article and comment if you have some queries or want to share some helpful information on this topic.